Sunday, March 17, 2013

Eisenkern Warthog Progress

I've been working away at finishing up a review of the Eisenkern heavy weapon box set, but in the meantime I've worked up a little progress on my warthog conversion.

First up I worked up an A-Driver figure with an SMG.  It's a little bit of a cheat as he's holding it left handed, but it was the only way to make it fit without torquing the upper torso very far around which didn't look right.  This uses the upper body from the basic stormtooper box and another set of legs from a 40K Imperial Guard Sentinal Driver.


Next up I worked on a gunner with pintle mounted machine guns for the rear bed.  Again I started with a body out of the basic box.  Then I added arms and twin machine gungs from the accessory box.  With the shoulder pads I couldn't quite get them tucked into the shoulder sockets, so they are right about chest level.  I used spare drum magazines from AA gun in the heavy weapons set as they are a little bigger than the ones from the accessory set or the basic set.


I used various sizes of styrene tubes to work up a rough pintle mount and a gun shield.  The mount needs more clean up and detail work.  I'll see if I can fit a belly pad in there as well.  The gun shield is just a paper mock up to test out the dimensions.  Once I settle on a shape and size I'll make the final version out of .02" sheet styrene.


The leg position doesn't quite give you the ability to turn the gunner all directions, I can turn him left and right.  Tactically this thing is silly as all get out, but I think it still looks pretty cool.  Hopefully I'll have this ready for paint next week.  Here are some more pics.  As always comments welcome.


Wednesday, March 6, 2013

Stormtrooper Scout Car WIP

I'm still having lots of fun with my DreamForge Eisenkern Stormtroopers and one idea I've been doodling around with is the idea of giving them a ride.  There was a stretch goal during the kickstarter campaign to produce some vehicles like an APC, artillery, and ant-tank vehicle but I didn't pledge for them for a couple of reasons.  First, they will be BIG.  Listed at 7.25" (L), 3.25" (W) and 2.25" (H) that's getting close to land raider sized.  Second, at the time of the kickstarter I wasn't certain how the kits were going to turn out and the vehicles were more than I was willing to risk.  I might still purchase them when they come out, but for now I want to come up with something else.

So, looking for alternatives, I went with what I already had on hand rather than ordering something.  Here's some things I rejected:

Old Crow - I really like Old Crow's style, but being closer to 28mm models than 30mm, they look just a little too small next to the figures.

Warhammer 40K - No, just no.  I might steal a turret off of a Space Marine Predator for some future project, but that's all that fits.

AT-43 ONI - I managed to pick up a bunch of the armored fighting vehicles from the ONI faction of AT-43 before Rackham went in the crapper.  I might use some in the future, but as they are closed vehicles, with no TC or drivers hatch, there's not much to tie them in.

1/43 Diecast Cars - I picked up some cheap civilian H2 hummers a while back and they showed promise, but they were just a hair too big.  Again, I might use them in the future but they are sidelined for now.

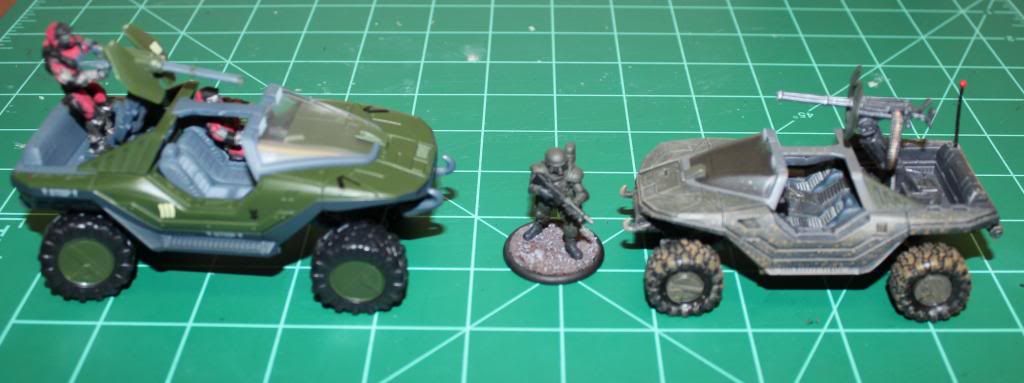
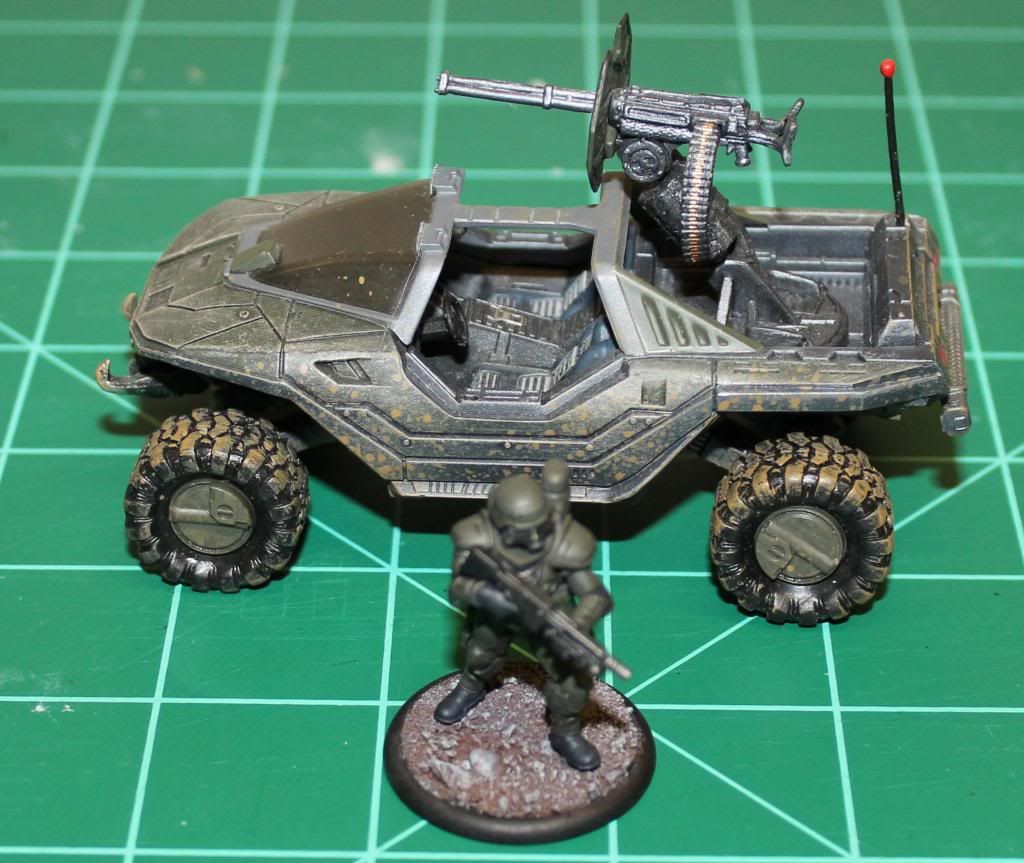
So what was I left with?  Halo warthogs.  I have a two different kinds on hand.  The first is the Wizkids version from the Halo Actionclix line and the second from McFarlane's first vehicle series.  Both are now out of production but you can still find them both for around $14 a piece +/-.


With my estimation of the Stormtroopers being 1/51 scale, the Wizkids version was actually dead on at 1/51 while the McFarlane version was a little small at 1/58.  In the end what tipped the balance was ease of conversion.  The   Wizkids version is glued together and damn near impossible to get apart with breaking or cutting something.  The McFarlane version is screwed together and comes apart (and goes back together) with ease.  Plus the ones I have I managed to pick up cheap at $5 a piece a few years ago.


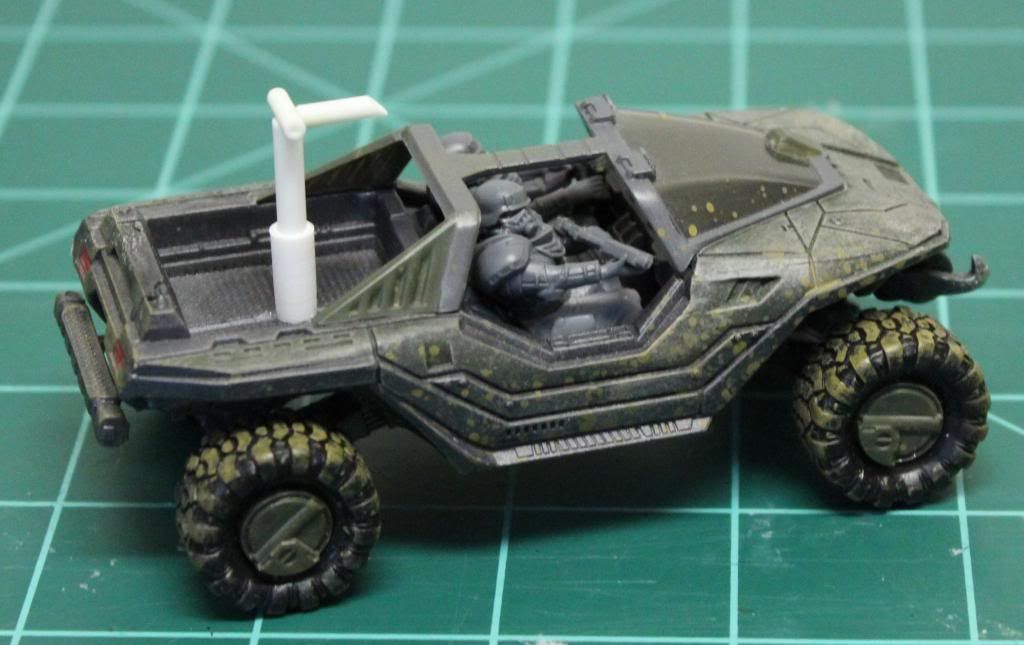
Breaking down the vehicle was the first step, which was easy, mostly unscrewing eight screws.  I did have to use a hobby knife to take off the windshield part.  There are two posts on the back that are glued and I couldn't get apart.  Here's the parts line up.


So far, my only progress has been to get a driver.  I first tried to use legs from the Stormtrooper box.  If you use the left and right legs from the mirror image kneeling legs, you can get a lower body in a sitting position.  Unfortunately the legs were too big to fit in the cockpit and the angle didn't really fit with the seat.  Back to the bits box I went.  When I bought the hogs in the first place, I also bought a bunch of leg pieces from a GW Imperial Guard Sentinel Kit.  They actually fit much better than the Stormtrooper legs.  You have to cut off the feet and cut out the center console between his legs, but I can build that back with green stuff later.


To the legs I added a standard torso, head and shoulder pads.  The arms and hands came out of the accessory set.  The whole thing was pretty fiddly because the seats have a serious Detroit lean to them.  In the end I managed to get it together and keep it just under the top of the roll bars.

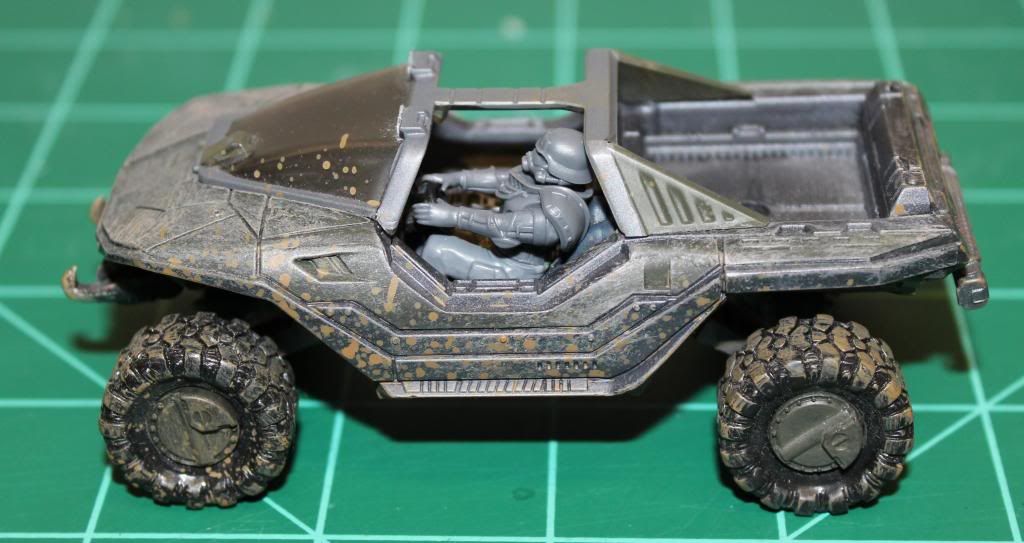
What's German for Yeehaa!


Next up I need to clean up the legs.  I need to green stuff the center where I cut out the console and I think I'll shave off the cargo pocket on the outer thigh and use a press mold to add in the same detail as the stormtrooper thighs.

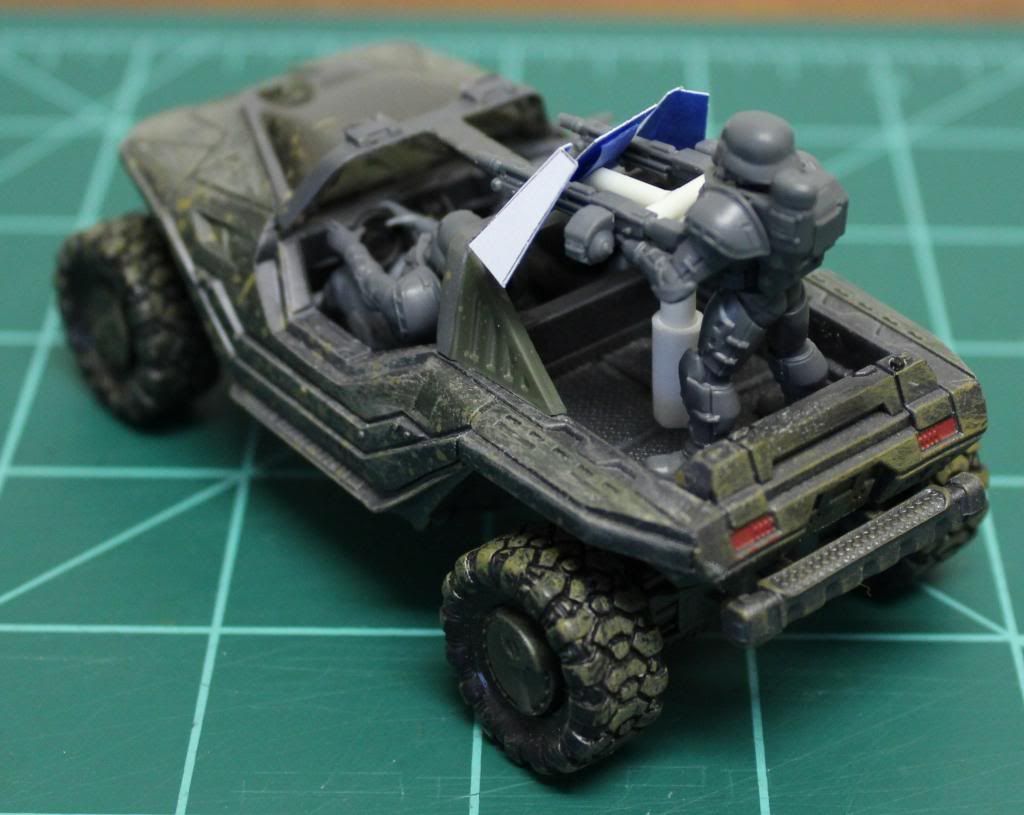
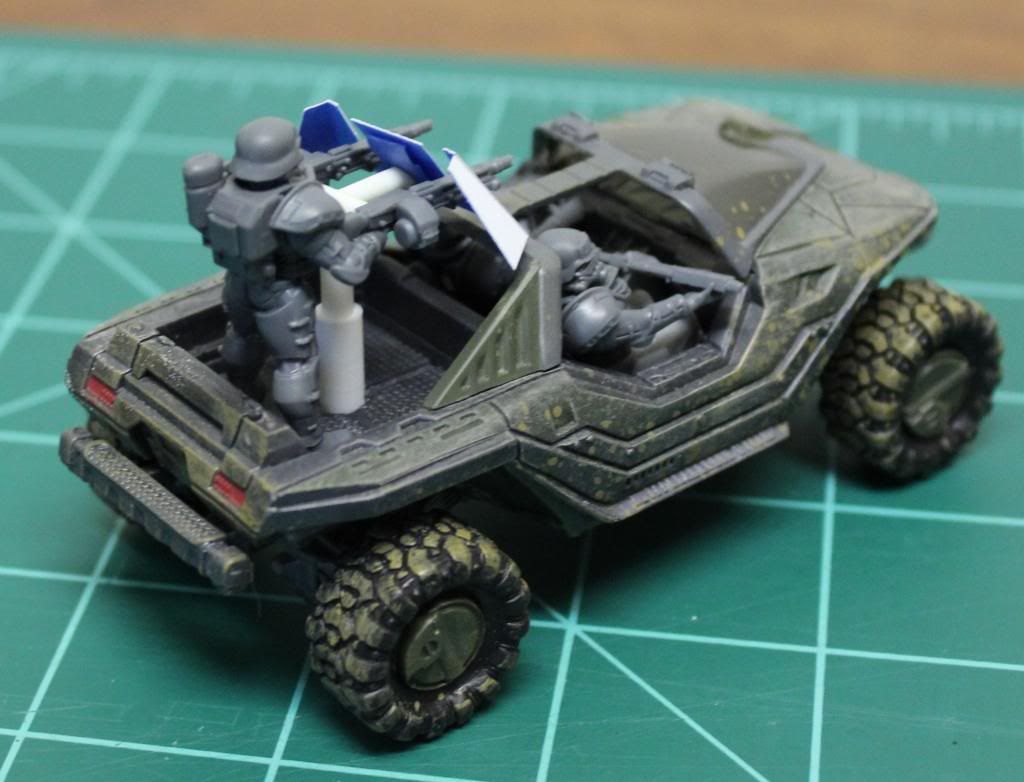
After that I need to get to the passenger.  I'm thinking of giving him an SMG firing leftie.  After that I am noodling through what to do in the back.  I can add the quad MG from a Heavy weapons kit or I can add a standing stormtrooper firing an MG from a pintle mount.

I think the biggest challenge will be to keep it from looking like the iconic warthog that it is.  I think festooning it with stowage, adding doodads (front pusher bar, grab handles, pioneer tools etc) and giving it a new paint job should help get it looking at least a little distinctive.

More to come, vroom vroom.


Monday, March 4, 2013

Dreamforge Eisenkern Mule

I've been working on more of the DreamForge plastic models and am still impressed by their quality.  I recently finished one of the mechanical mule kits that come in the Eisenkern Accessory Set.

The model is inspired by the "Big Dog" robot created by Boston Dynamic.  More on the real thing can be found here.

The DreamForge accessory set comes with three mule kits in the box to accompany your stormtroopers.  The mule is well designed and goes together easily until you get to the legs.  Each leg comes in three pieces.  Let me rephrase that, three tiny pieces.  Mark from DreamForge gave some good advice on his blog to assemble the legs and let them dry before attempting to attach them to the body.  It's good advice and it helped me get the kit together without much trouble.  The kit comes with two heads.  One is a more artificial looking head with a sensor mast called the "command and control head".  The other, which I chose for this model is the more anthropomorphic "smart mule head".  I don't know if the different heads will have any effect on game play, so I'll probably magnetize the heads on any future kits.

For ease of painting, I assembled the body, head and legs, but left the top platform and side cages separate until the end.  I painted the body in gunmetal and the rest in the same German Fieldgrey as my trooper's armor.  Just to add a little personalized touch I printed up some decals for ID markings.  This mule is C2-2 "Big Dog" (Charlie company, 2nd Platoon, 2nd Squad).  They turned out ok, but the decal on the head silvered a little.


A mule won't do the squad much good without cargo.  The accessory set also comes with storage crates (three small and six large).  I painted these up in a lighter green and gave them decals as well.  The smaller crate is medical supplies and the larger crates have ammunition.  I also wanted to add some Class I supplies (food and water).  I scrounged through my bits box and dug up some 1/35 scale water cans and added a ration box that I printed on card stock.

Without knowing how the mule should be loaded up for game play, I decided to make the cargo loads interchangeable   I cut two small pieces of 0.04" sheet styrene to fit between the side rails of the cargo platform and then glued the cargo to the styrene to create cargo pallets.  I painted up a spare panzerfaust (also from the accessory set) but haven't glued it down.


Here is the completed mule with a Class V loadout (ammunition):


Here's one with a Class I loadout:


All in all, a nice little mini kit, although the engineer in me thinks the large platform so high up would make the thing very top heavy and prone to toppling in rough terrain.  I think the real life version with the saddlebag type arrangement would work better.  I have to say that this should be for experienced modelers or novices with an abundance of patience.