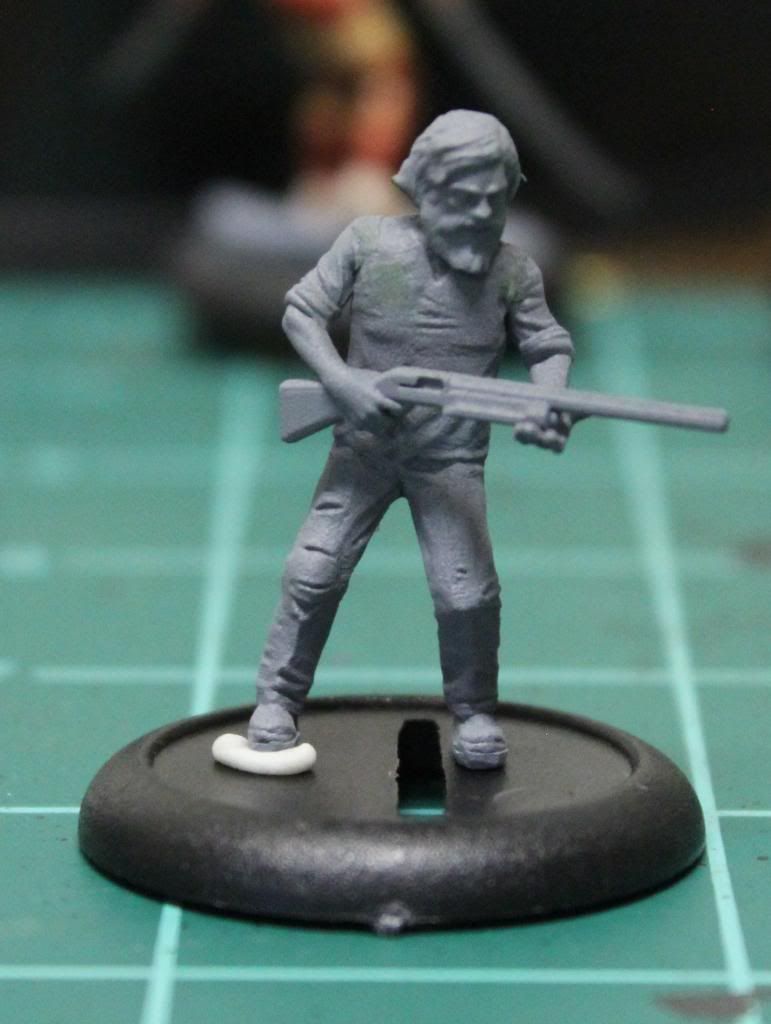
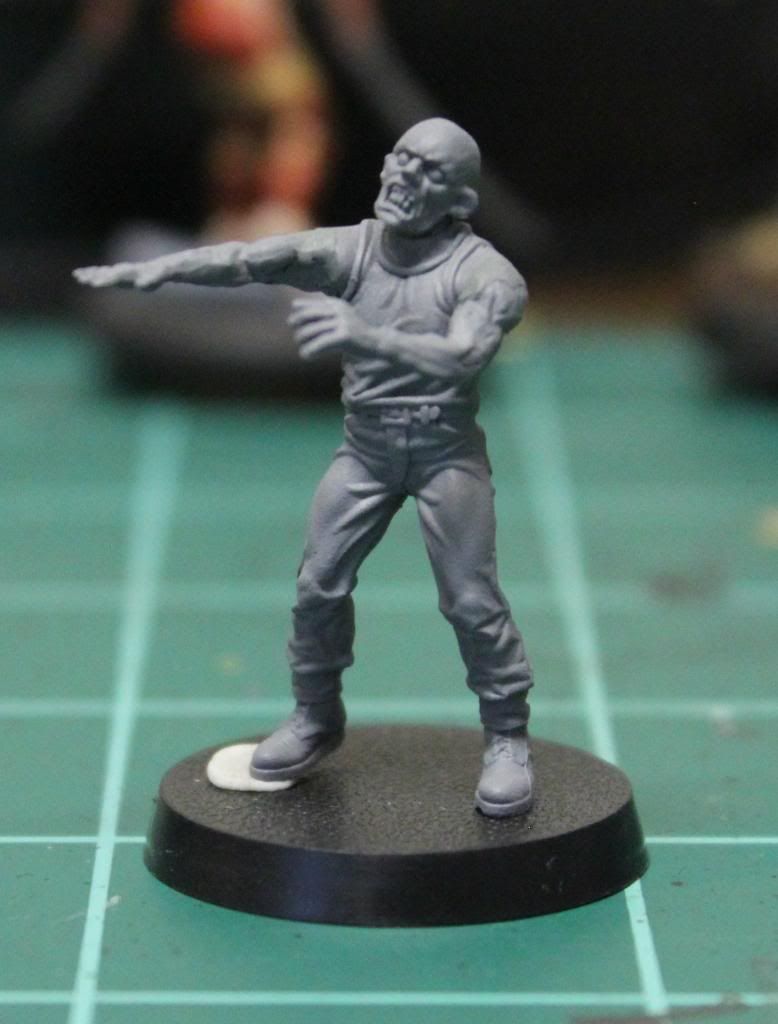
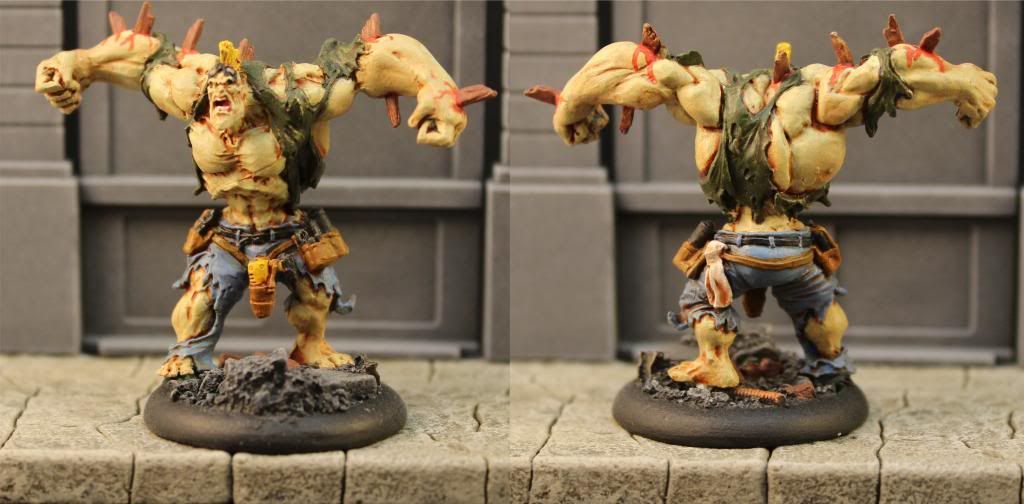
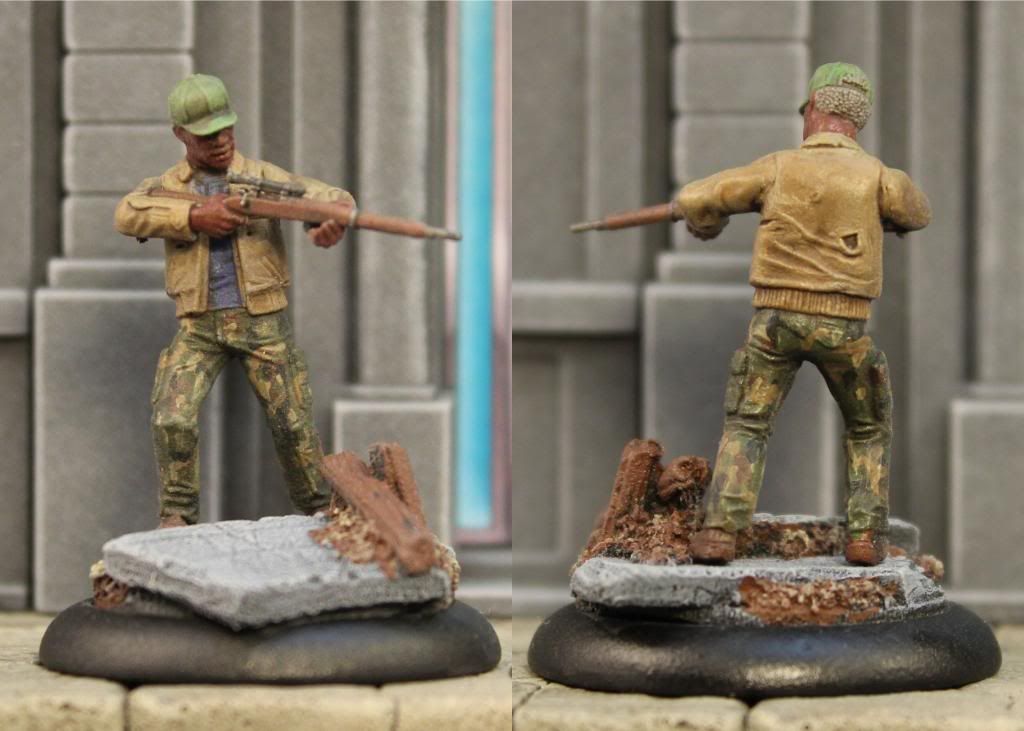
Friday, December 13, 2013

Awaiting the Arrival of Deadzone

I'm a pretty pro-kickstarter consumer and over the summer I pledged for the "Deadzone" campaign from Mantic Games.  The first phase has started shipping and while mine hasn't arrived I though I would get a jump on some miniatures.

The game will ship with two standard factions, the Enforcers and the Plague.  Mantic had planned to make up much of the Enforcers with hard plastic figures.  As the hard plastic was harder to work out than they anticipated, those figures are slipping to the second phase, scheduled for sometime next spring.  To make up for the slip Mantic decided to hold off any of the booster figures and replace some of the starter faction figures with the older Warpath enforcer kit.

I picked up a load of those older enforcers cheap off of ebay a while back but never got around to building them.  To get ahead on the enforcers (and to bleed off some of the anticipation while I wait for my package) I decided to put a few of them together:


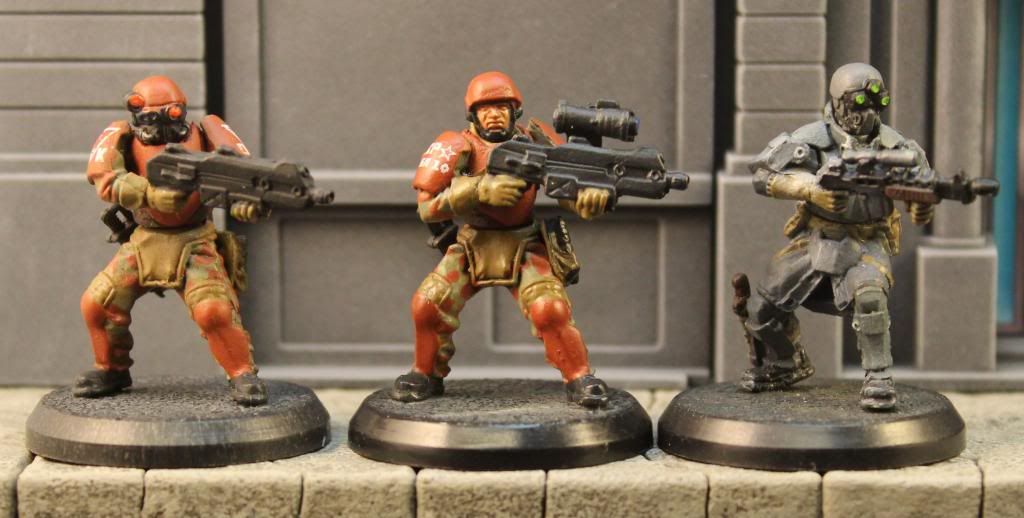
ENFORCER RIFLEMEN

These are your basic rifle toting squadies.  The Warpath kit comes with three different leg stances similar torsos and two different rifle arms.  I went with a pretty simple three up color scheme with a black wash.  The only color is to the helmet crest and shoulder pads.  I will have a different color for each part of the force (red for shooters, yellow for assault, blue for leadership and green for support).
I decided to try something new on basing with these figures.  I usually do decorated bases and often custom resin one's as well.  With the enforcers I decided to go simple with clear acrylic bases from Litko Aerosystms.  I trimmed away the awful integrated bases that come on the figures, drilled in a brass pin and then drilled that into the base.  The only real challenge was the glue.  Cyanocrylate (super glue) style glues react with moisture in the atmosphere and have a tendency to fog clear parts like the acrylic.  I tried out a glue from Testors designed for gluing clear canopies on model airplanes, but the bond just wasn't strong enough.  The method I used in the end was to use a very sparing amount of a super glue gel to keep the glue just under the figure foot pads.  There is still a little frosting on some of the bases, but it's minimal and only visible if you're really looking for it.


ASSAULT ENFORCERS

Using the same set of legs and torsos but a different set of arms and heads are the assault enforcers.  Unlike the riflemen there is only one set of arms available in the kit.  To get some variation to the poses I used hot water to reshape the poses.  Hopefully as time goes buy the restic material won't revert to it's original shapes.


ENFORCER WITH BURST LASER

The only heavy weapon type in the kit I bought, this will also be one of the extra figures in the box.  Not the best pose but still an ok figure.


ENFORCER SERGEANT

Mantic released a digital copy of the Deadzone rules a few weeks ago.  I haven't played any test games but I have had a read through.  From just reading it looks like leader figures will play an important roll and unfortunately the Enforcer Sergeant is a figure that has slipped to the second wave.  I decided to convert one until the official models are available.  I started with an assault enforcer for all but the right arm.  I used a spare power fist from a set of corporation marines I had left over and mated it to the right arm from a burst laser figure.  To further differentiate him from the regular assault enforcers I found some utility bits from the Warhammer 40K Space Marine Scouts to put on his belt.  All in all I'm pleased with how he came out.


Friday, November 1, 2013

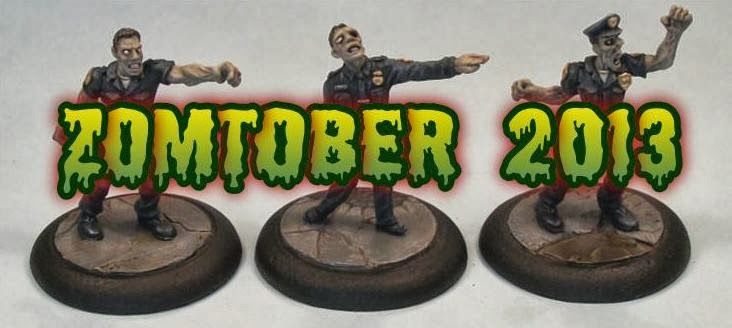
Final Zombtober Entry (and more than a little late)


Up today is my fourth and final post in the Zomtober Challenge.  The goal was to  post on Sunday, but I obviously didn't make it.  I tried last night to come in at least on Halloween, but taking the kids trick or treating got in the way.  Long story short the post slipped to November (cue the sad trombone music).

Looking back, painting and basing six survivors in an already busy week was probably overly ambitious, but I did finally get them done and photographed.  Here are the six survivors that come in the Zombicide: Prison Outbreak stand alone board game.  Thankfully they are also backwards compatible with the original Zombicide as well as the Toxic City Mall expansion.

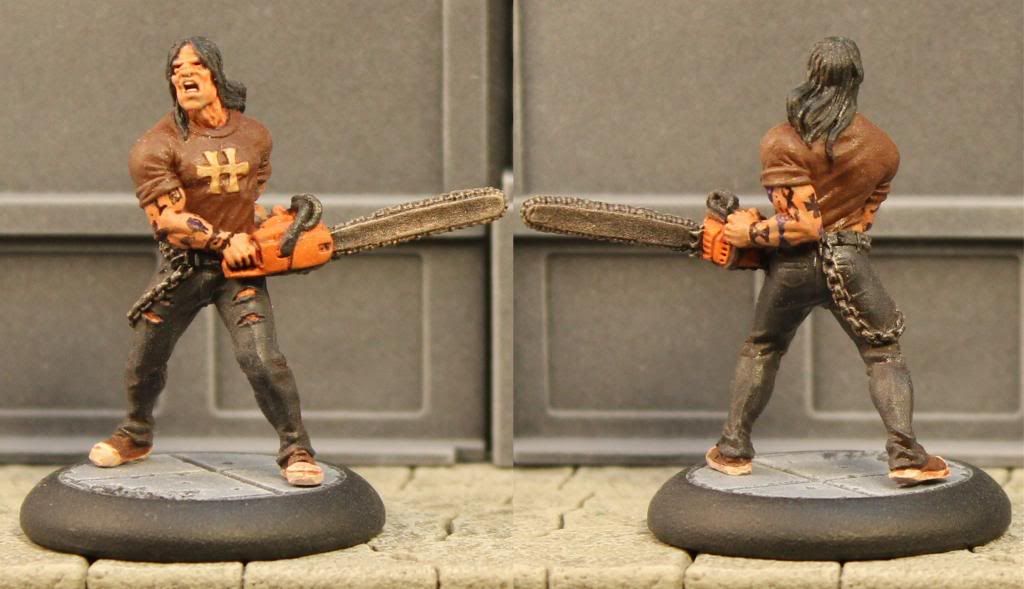
Grindlock, The Headbanger

A nice figure, but Grindlock was also a chance to try something new.  The concept art showed his arms full of tattoos.  I hadn't done anything like that before.  I'm not very good at free hand painting things like this, so I looked at some of the tattoo decals available but didn't really like any of them.   I finally decided to ink the tattoos (pun intended).  I used a black 0.05" Sakura brand felt tip ink pen and drew the tattoos on the arms.  It was difficult the first time and I ended up painting back over them and trying it twice.  I ended up doing it on a day that I didn't have any caffeine which seemed to help.  The end result is passable if a little blobby.


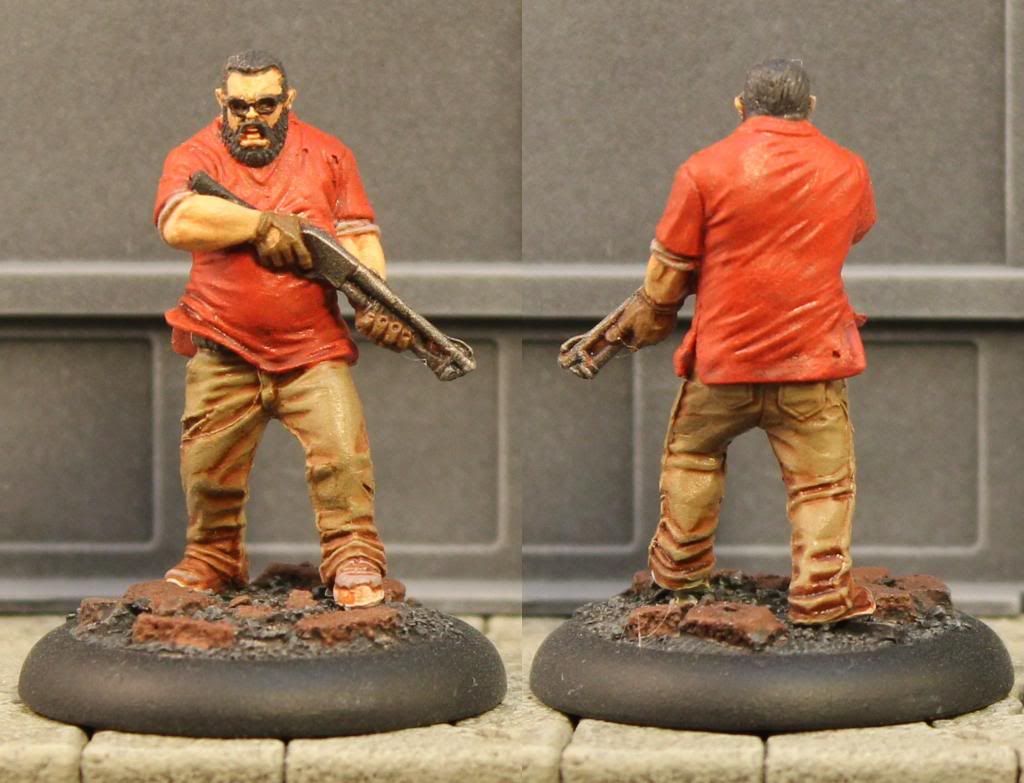
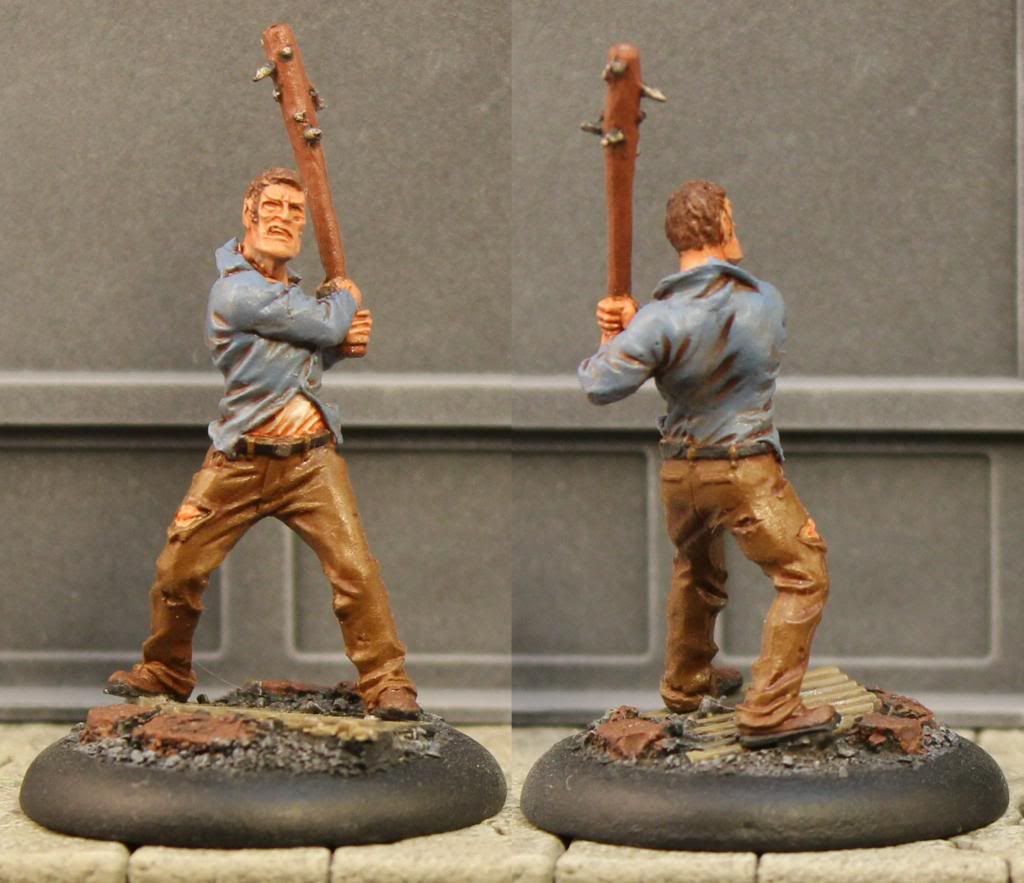
Joshua The Protector

Not to be confused with Josh The Thug from the core box, Joshua is a little more heavy set and a little taller.  The figure is well executed and I think it came out well.  I really need to find a Red Sox decal for his shirt to match the concept art but so far I've struck out finding one small enough and I'm not good enough to free hand the logo.  Overall I think he's my favorite figure of the bunch.


Kim, Pokerface

Not much to say here.  Decent sculpt with a standard paint job.


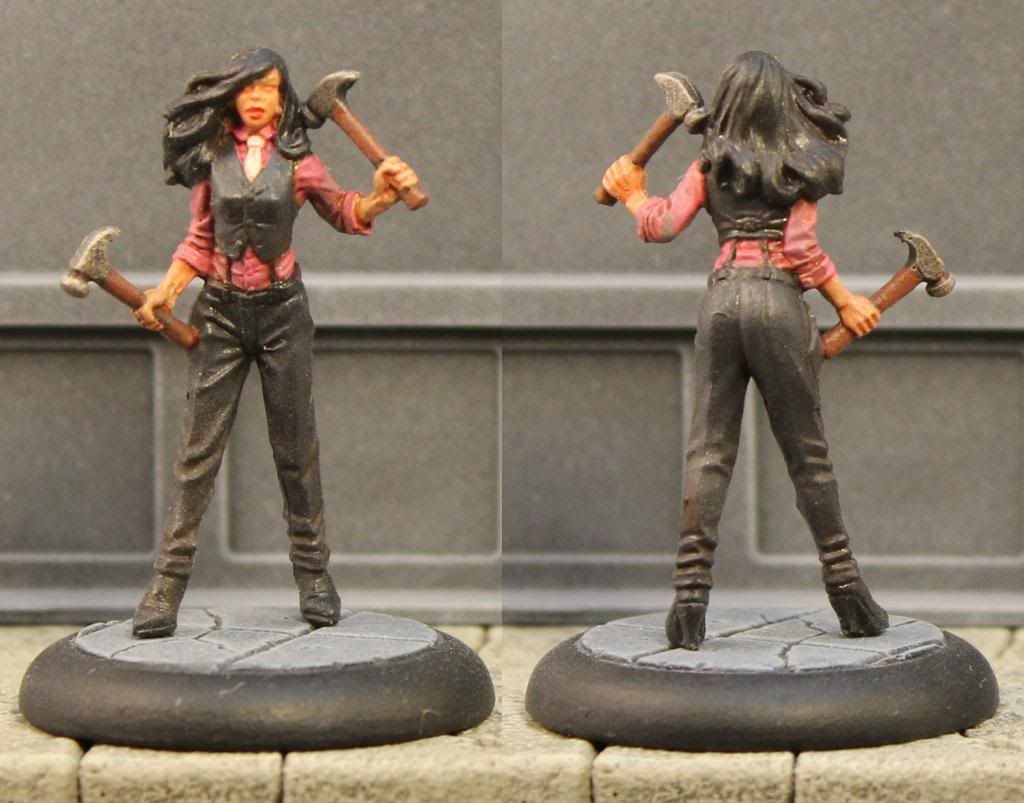
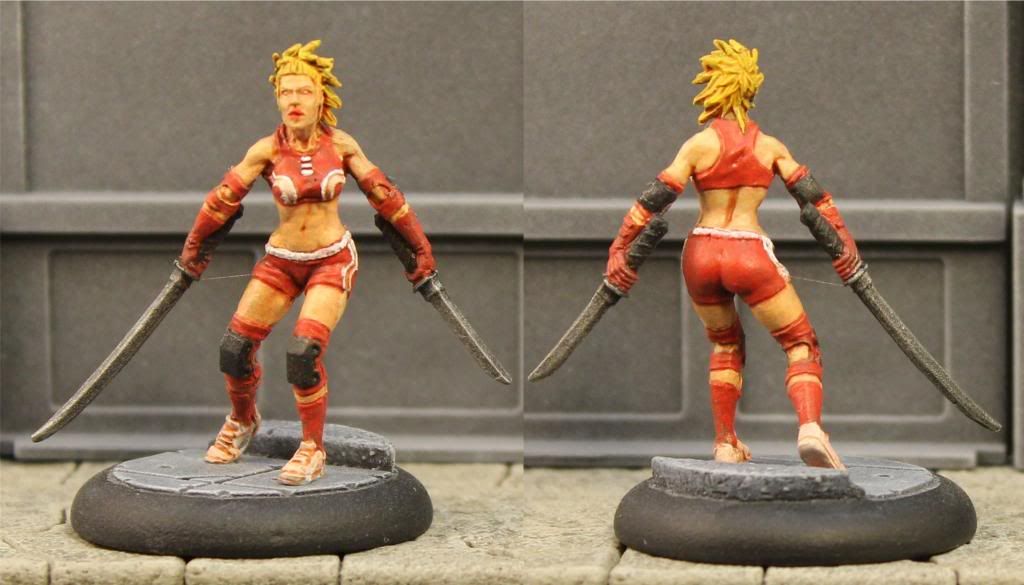
Parkour Belle

Belle's a bit of a nod to the French designers a presume (David Belle Wiki).  She was the last figure of the bunch I painted late one night so the stripes of the uniform are a bit off and I probably should have spent more time on her face but oh well.


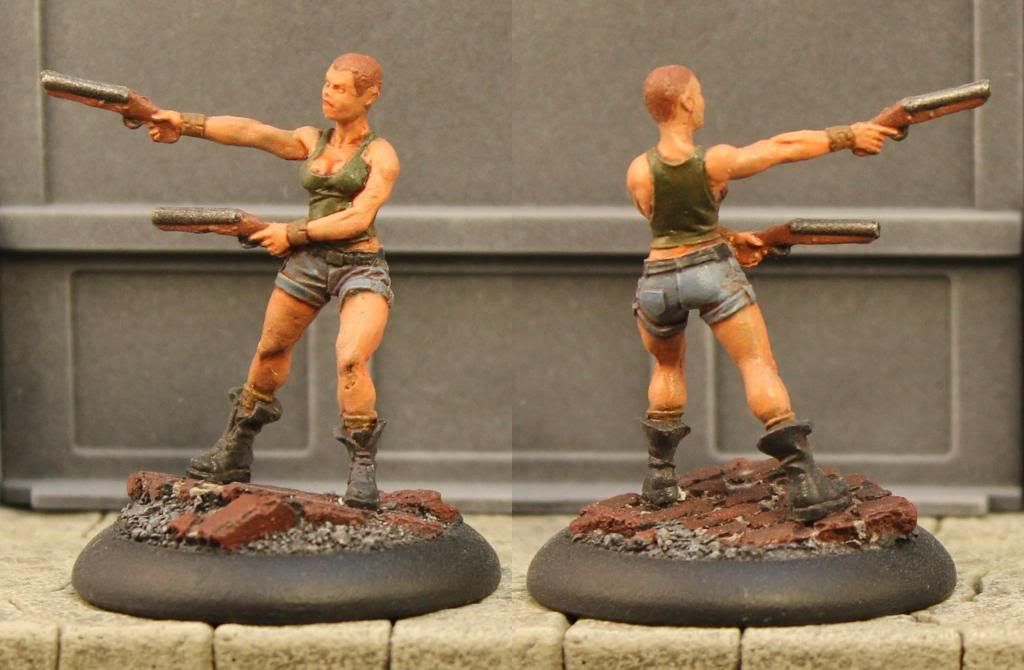
Shannon The Soldier

Shannon was a bit of a disappointment for me.  The figure is generally well sculpted with the exception of the face.  It is a bit soft on the detail, which really isn't helped by my painting style.  I know that sculpting softer details helps set the female figures apart from the from the male figures but I think Shannon's sculptor went a little too far in that direction.  She also suffered a bit in my general rush to get things done.  I don't have the time now, but I may go back in the future and try to paint and blend some better facial details.


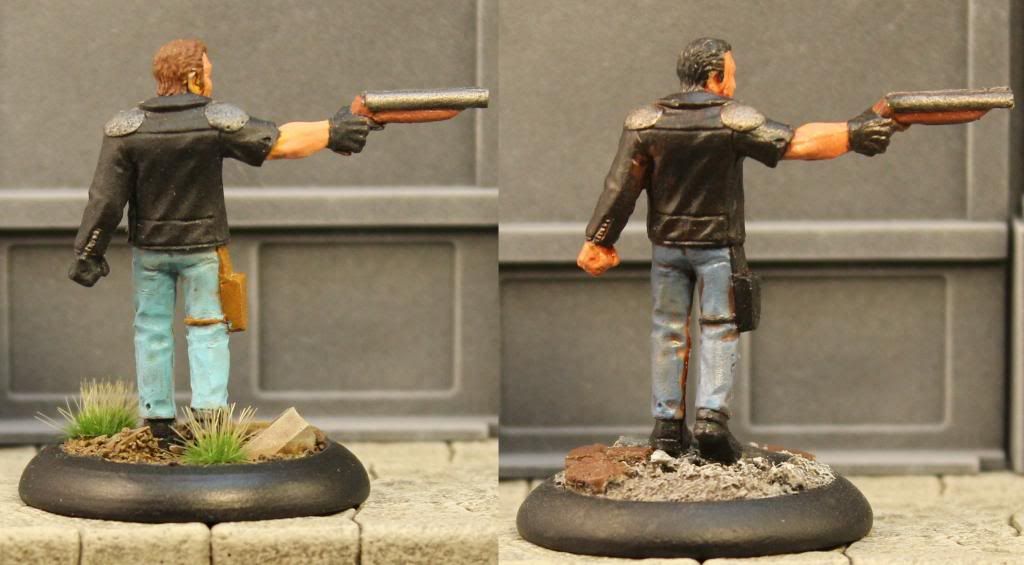
Watts The Family Man

Another nice figure with good character sculpted on.  


Overall a nice set of figures and a great addition to my survivor collection.


Thursday, October 24, 2013

Reaper Minis - Metal Versus Bones

I'm switching gears a bit, though still sticking with the post apocalypse theme, and looking at the "bones" minis from Reaper.  The Chronoscope line of figures from Reaper is an interesting and aclectic mix of characters from steam punk all the way through hard sci-fi.  There are also a nice selection of modern day, post apacalyptic types that fit in both thematically and scale wise with my other figures.  I think I have around ten in my collection, but I have shied away from them the last couple of years as I've been seeking out plastic figures where possible.  With the Reaper bones campaigns it has been possible to now get the other figures in plastic.

Unless you've been hiding under a rock you know that the second kickstarter campaign from Reaper Miniatures is going on.  They are again featuring a huge bucket of figures to be produced in the Reaper "Bones" plastic.  I didn't go in for the first campaign and I am wrestling with the decision on whether or not to go in on the second.

I passed on the first kickstarter for a few reasons, most important was that I wasn't sure how the conversion of metal miniatures to the bones plastic would shape up.  Reaper has done a few test figures in bones plastic for years but I never tried them out.  After the delivery of the first kickstarter rewards I've seen a number of reviews but I still have not decided if it's worth taking the plunge with the second campaign.

First thing to know is what the hell is bones plastic?  The short answer is that bones is soft plastic.  The long answer is that bones is some form of PVC (polyvinyl chloride).  In terms of details and stiffness the results are equivalent to average board gaming figures.  Think modern fantasy flight figures like those in Decent II.  I don't know if it is spin cast or injection molded, but I don't think that it really matter to me.  Commodity prices on the raw ingredients for metal figures have risen steadily for the past decade, so it certainly makes sense to me that Reaper would attempt to branch into plastic figures to help it's bottom line.  Given the overwhelming success of the first campaign and the generally positive reviews of the figures,  I have been considering jumping into the second campaign.

With the first campaign figures finally hitting retail shelves I decided to give one a whirl and see how it shapes up.  To really put this material to the test I decided to pick up a copy of a figure I already had in metal.  I settled on the "Rex, Dark Future Hero".  This is a metal figure and one of the first Chronoscope figures I picked up nearly five years ago.  This week I purchased his bones version and got to work.

I didn't bother to take any pictures of the figure out of the package.  The light color of the bones plastic, along with the low contrast makes the raw bones plastic hard to judge, so I dispensed with the before shots and got down to work.  Out of the package there were definitely mold lines, but they were relatively light and not much different from the metal figures.  The down side though is that with any other PVC figure (Mantic Restic for example) you can not scrape off mold lines, you need to remove them with a forward stroke.  This is a bit more time consuming than scraping metal, but not a serious chore.

One change from metal to bones is the base.  The metal figure came with a slot tab and included a slotted, round lip 30mm base.  The bones version comes with an integrated 23mm round base, but no separate plastic base.  This seems like a good idea in theory, but because the integrated base was kind of thin and flexible, I don't see any gamer using it on it's own.  It could be glued directly to a plastic base, but I didn't bother.  I just clipped it off and used a resin 30mm base from my bits box.


Here I've got the two painted figures side by side with the metal on the left and the bones plastic on the right.  Generally the figures match pretty well.  There is some obvious loss of detail, but nothing serious.  The beard has disappeared, holes in the shoulder pads are almost gone and the belt buckle is a little soft.  

The worst bit is the barrel of the sawed off shotgun.  It is not easy to see now, but out of the package the gun barrel was a mess.  There was a noticeable mold offset on the top, the ends of the barrels were wonky and worst of all the barrels themselves were cast out of round.   After some careful trimming and shaving I got it looking decent, but not as good as the original.  It is certainly a little disappointing.

For me the figure is an acceptable trade off of quality versus price.  While it's usually not a good idea to judge a whole line on one figure, the results on Rex seem to fall in line with what I've seen around the internet from other reviewers.  Bones figures about half the price of their metal equivalents, have less detail and the thin bits like spears, swords and gun barrels are often wonky.  For me it looks like a case of you get what you pay for.  Metal is nicer, but more expensive.

Unfortunately I think I'll pass on this kickstarter campaign as well.  The figures fall into line with what I'd consider "value" but the make up of the campaign itself is problematic for me.  Unlike the first campaign, Reaper has done away with small pledges and you now need to pledge for the "core" bundle ($100) to participate at all.  This bundle is unfortunately weighted very heavily to the fantasy side of Reaper's catalog.  There are a lot of great looking figures in the core set but I do so little fanasty gaming these days that I just don't need them and I fear they would just end up sitting in a box for years.  Oh well, I figure I'll do like the first campaign and just wait for the figures to hit retail.  I'll probably pay double the kickstarter price per figure, but at least I'll get to pick and choose what I want.

Sunday, October 20, 2013

Zombtober Week Three - Survivor and Zombie Conversions


It's another October and time for my third installment of the Zombtober Challenge.  This week is a little bit of a cheat for me.  I've painted up some zombie and survivor models I converted back in September.  You can see the original posts here with descriptions of the conversions and some work in progress shots.  I now have them painted and based and here are the finished figures:


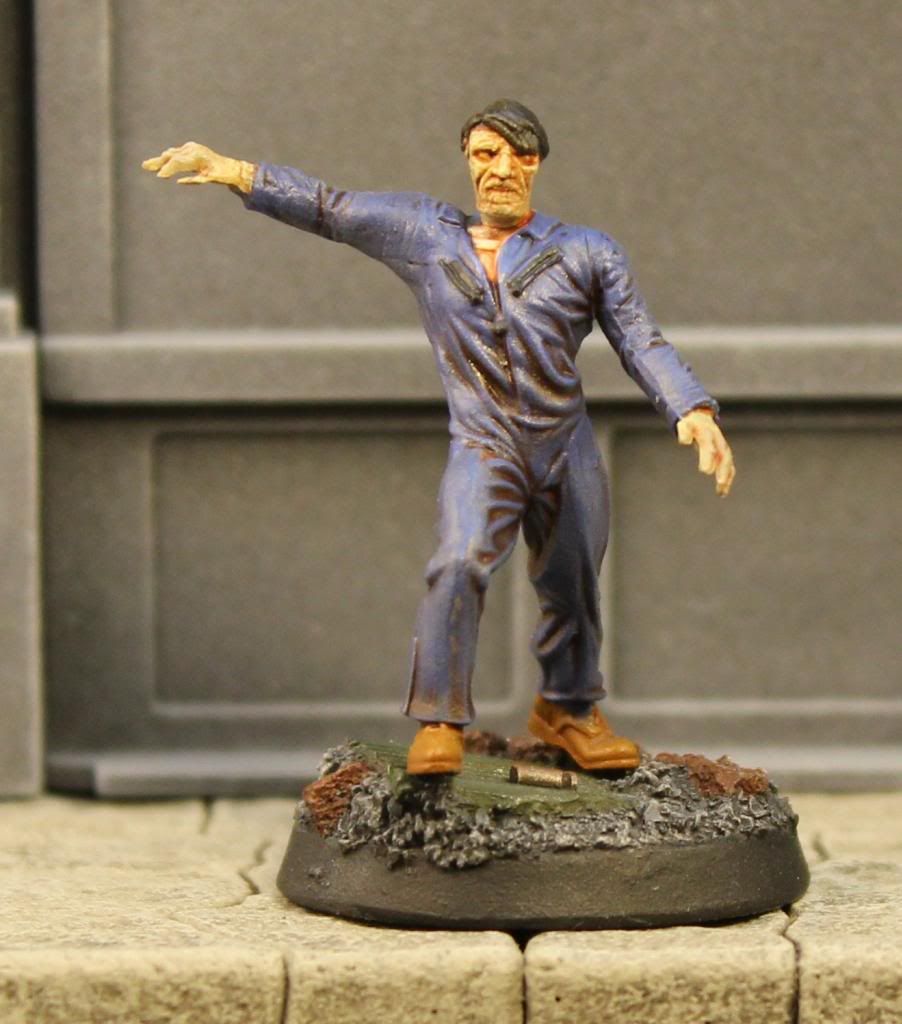
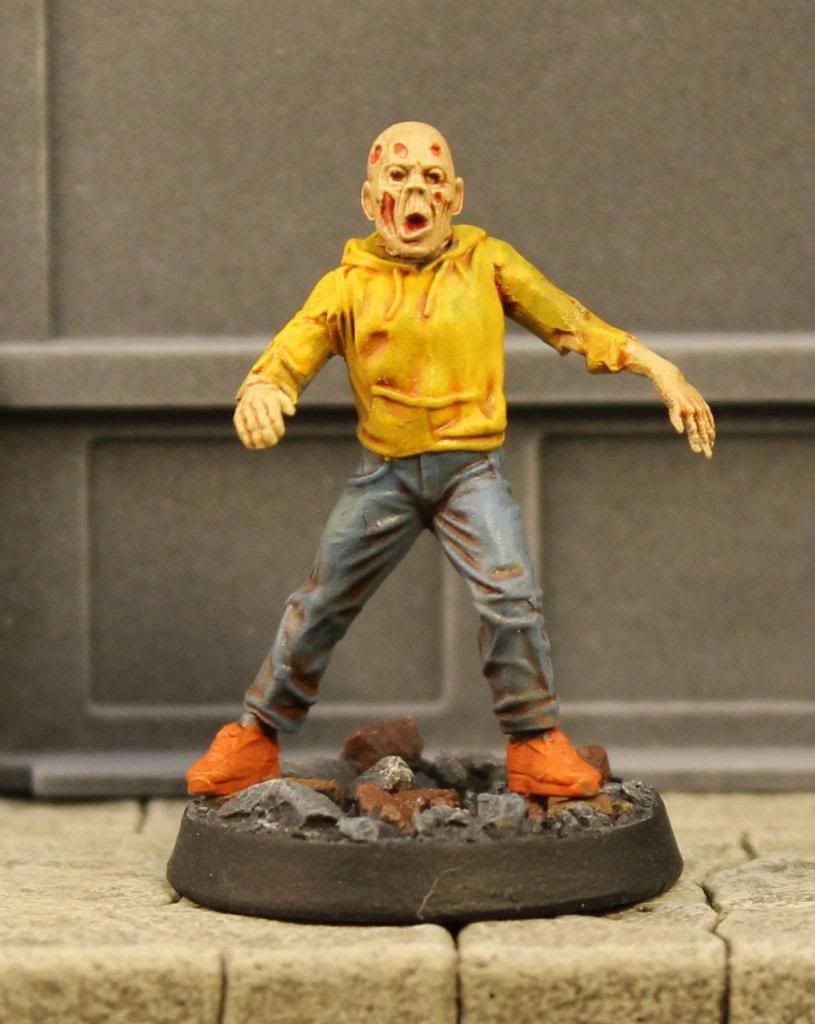
First up is a figure using a Studio Miniatures zombie body with head and arms from Wargames Factory.  The figure turned out pretty well.  I was a little worried that the head and arms were too big for the body, but the pose and paint did a good job minimizing the differences.


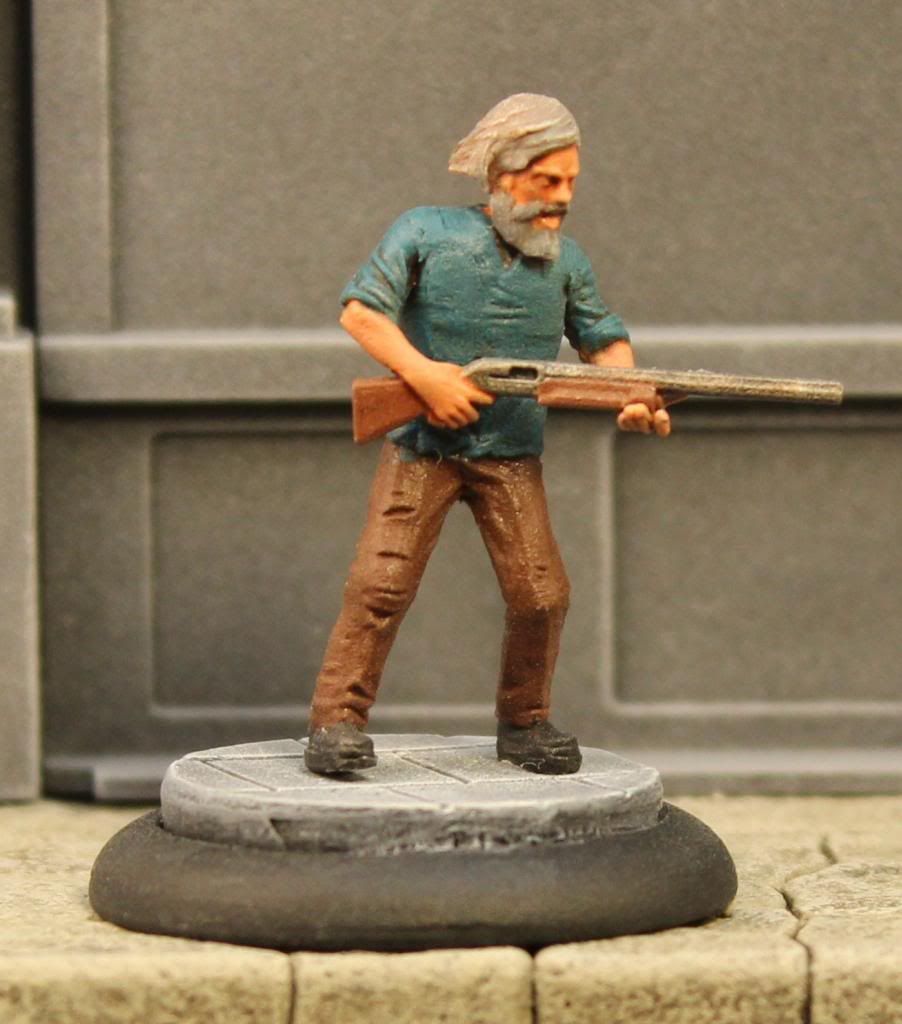
Again here's another Studio Miniatures body worked up as an old coot.  This time though I went with a set of WGF arms from the female set, which are slightly smaller.  The head is from a much older WGF set.  It might have been some celts but I can't remember.


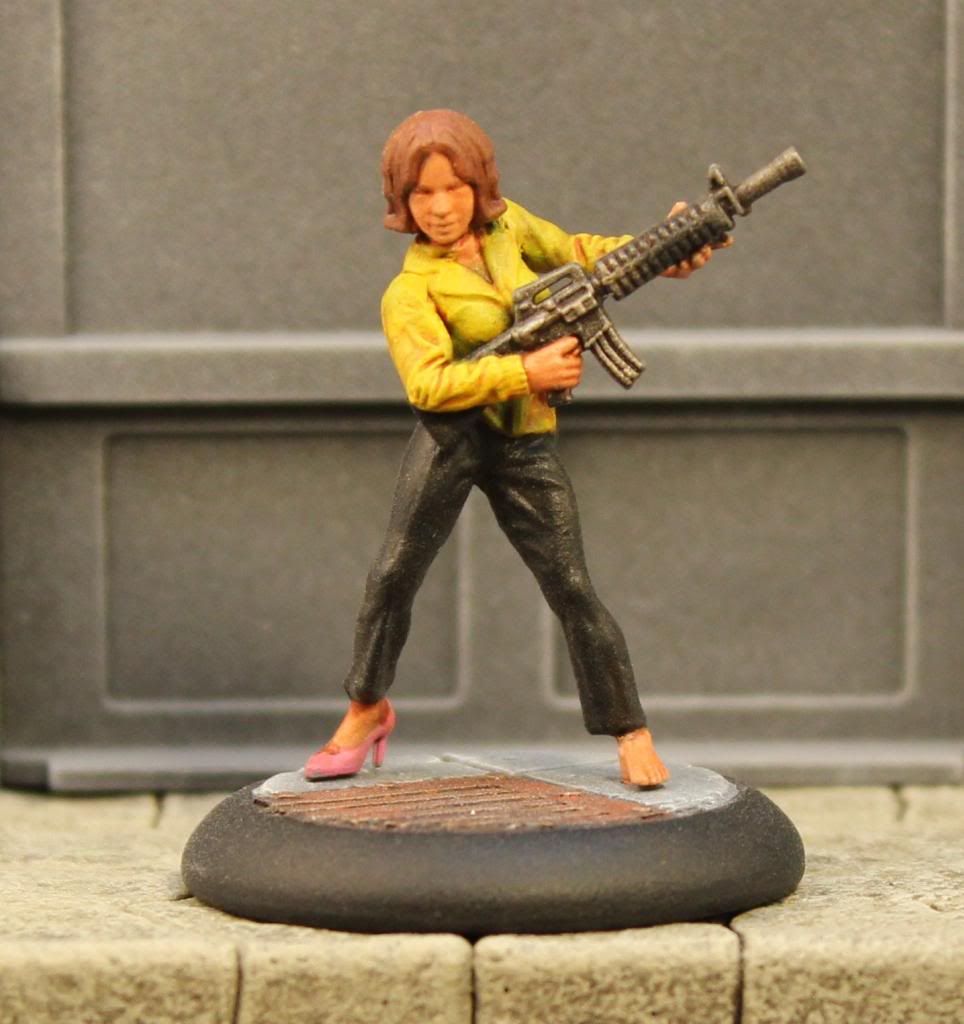
This figure turned out much better than I thought it would with just primer.  It's a WGF zombie vixen body and head and arms from the WGF female survivors.  I really like the final figure.  I rushed the job though, which  didn't see until I took the picture, but I forgot to add a spare high heel to the base and forgot to go over the rifle hand grips with black.  Dang it.  One thing that rally struck me working on the figure is how much sharper the 3D sculpting is on the survivors over the vixens.  With only a year between them it's impressive to see how much Wargames Factory keeps improving their game.


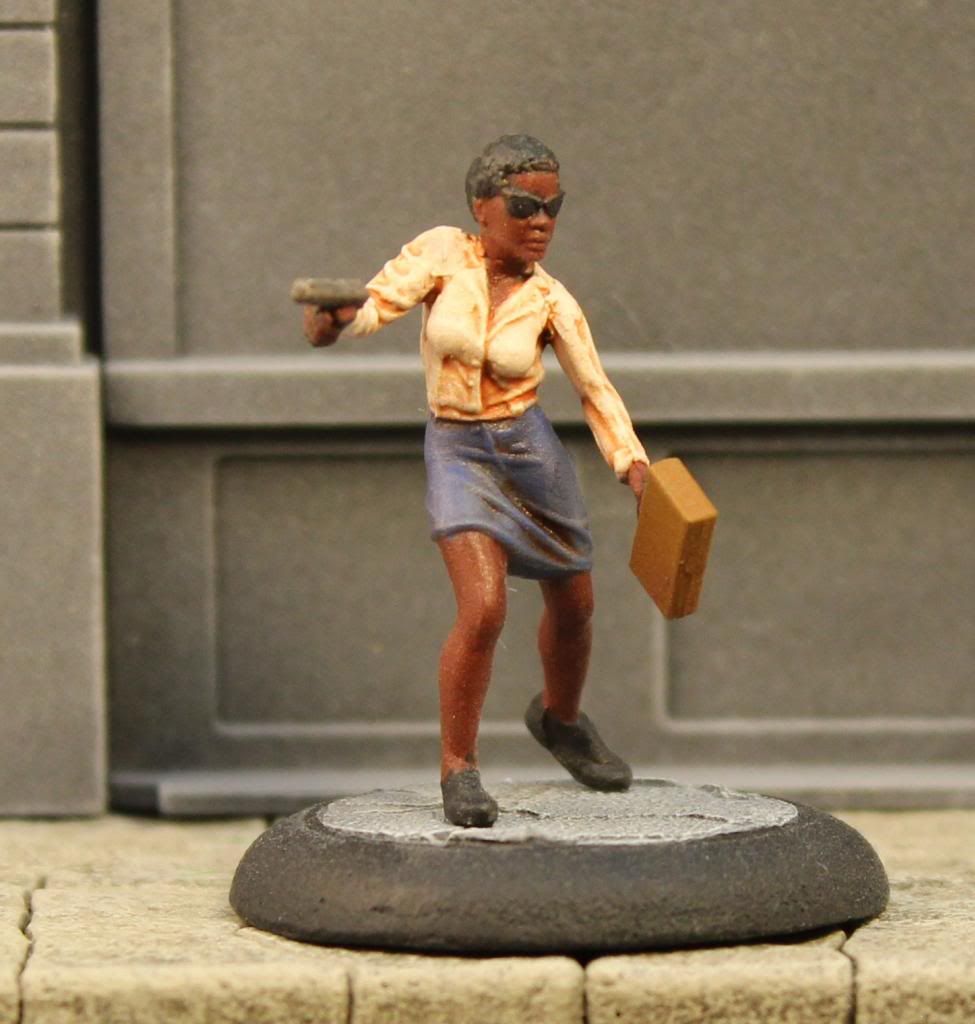
Last up for the survivors is another Vixen body and left arm with a right arm and head from the female survivor set.  The set of the shoulders is a little awkward and the zombie arm is a little thinner than the normal arm, but overall the figure still hangs together.


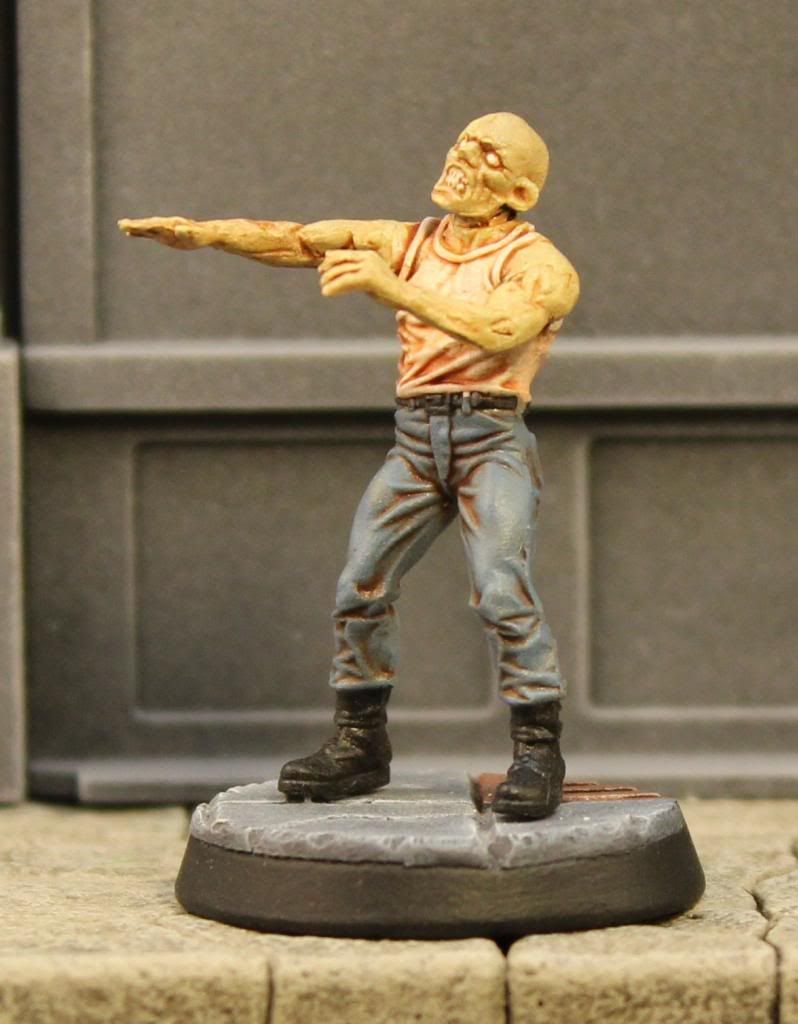
Up first for the zombies is a WGF male survivor body with head and arms from Studio Miniatures zombies.  it took quite a bit of green stuff to get the arms right, but the end result is still ok.  I was a little worried about the size of the head but I think it works.


For these last three zombies, they all have WGF male survivor bodies, Studio Miniatures zombie arms and heads from Mantic zombies and ghouls.  Generally they work, but the heads came out a little bigger than I wanted.  In hindsight all four zombies could have benefited from using putty and a hobby knife to add rents in clothing and wounds.

All in all the figures all tourned out well enough for the tabletop and I learned quite a bit to help make some better conversions in the future.  Best of all, I was able to use quite a few parts I didn't need to create some new and unique figures.

Next up is the big finally of the month with all six of the survivors from the Zombicide:  Prison Outbreak box.

Sunday, October 13, 2013

Zombtober Week II - Zombicide Toxic City Mall Survivors


For my second week of the Zombtober challenge (Eclectic Gentleman Tabletop Gamer) I'm continuing with the new Zombicide Season II release.  This time it is from the Toxic City Mall (TCM) expansion for the original Zombicide board game.

I decided to tackle the four new survivors from the box.  Out of the box the figures are generally well sculpted and as with the Prison Outbreak zombies from last week, they are cast with the same semi-rigid PVC plastic that holds decent detail while not being too flexible.  Flash was non existent on the models and while there were a couple of mold lines they were light and easy to remove.  The biggest difference between the zombies and the survivors is that the zombies are all monochrome casts while the survivors come in a rainbow of different colors.  The multicolored survivors are an advantage for identifying figures on the board, but the florescent colors used for TCM  really obscure some nice detail on the figures.

Again like the zombies I've clipped the figures from their  intragral bases and put them on some 30mm resin replacements.  I did the same thing to my original Zombicide survivors and the bigger bases did not cause any problems with crowding unless all six survivors try to cram into the same room.

Neema The Executive


Neema is a nice figure with a torn shirt an Uzi and a big honkin' revolver.  I'm never a fan of figures toting two hand guns, but at least she's only aiming with one of them.  The only down side is that the realistically proportioned heels are small and tough to pin to the base.

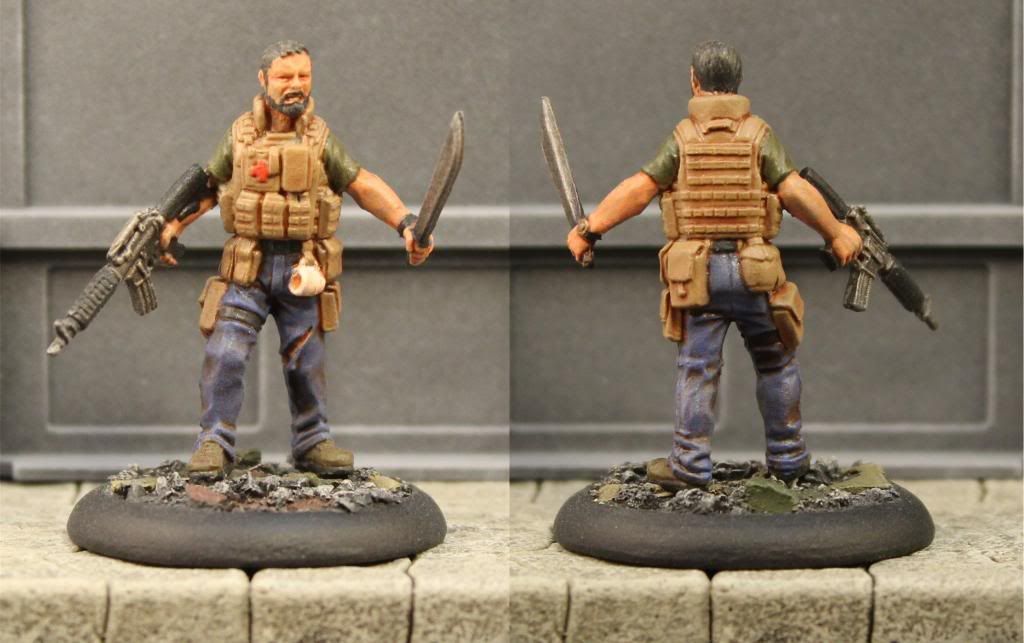
Raoul The Contractor


Finally we have a figure in this game that looks like they are ready to face the apocalypse.  Sculpted with a molle vest, an M-14 and machete, Raoul is looking bad ass.

Elsa The Cat-Burglar


Elsa was a bit of a disappointment and points to some of the limits of the single part casts.  The arm sculpted across the body and the revolver are a little soft and the face looking right is split across the mold line so is also too soft in my opinion.  My painting technique of solid colors with washes doesn't help to bring out what color there is on the figure either.

Derek the locator


Derek's another cool figure with his surveyor's vest and bag of lath slung over his shoulder.  I think he is nicely sculpted in a good pose.

Overall so far I'm very pleased with the components of the expanded Zombicide items.  I haven't had time to play any games with the new rules, but the figures are top notch in board game terms.

Tuesday, October 8, 2013

Search For Post Apocalyptic Private Security Spooks

I’m switching gears a bit with this post and taking a detour from the normal zombies and survivors while still sticking with the post apocalyptic theme.  Two Hour Wargames recently released the “High Rise To Hell” supplement for the “All Things Zombie” game.  This supplement introduces the Pro-Corp private security NPC characters to the game.  Reading the description, they remind me of the Umbrella Corporation troops from the Resident Evil universe.

I wanted to create some troops that would fit the bill of spec ops pros but be easily differentiated from standard military troops.  The items on my mental checklist are combat armor, enclosed helmet with NVG/gas mask, and modern firearms (no lasers or plasma here).  Looking around, nothing direct exists in plastic.  I know, I know there are plenty of metal models out there, especially from Wargames Foundry and Hasslefree, but I’m making a concerted effort to stick with plastic these days, or even restic if I have to.

I decided to start with out of the box solutions and rooted through my figure collection to see what I could come up with.

First up are the UAMC Marines from Defiance Games (Defiance Marines).  Although they meet my criteria, they are generally lackluster models.  I own a box of them, put one together and couldn’t even bring myself to finish painting it.  Also, the defiance marines are shorter and have the exaggerated “heroic” proportions closer to Games Workshop than my taller and slimmer PA figures.  They might work, but I’ll save them as a last resort.

Next up are the Corporation Marines from Mantic Games.  These models are a step up in quality from Defiance, and they are slimmer in proportions, but again they are a couple of millimeters shorter than my PA figures.  They would also need a weapon swap away from the laser rifles they come with.  These are viable candidates, but not really ideal.  Let’s see what else I can come up with.

I also looked at some out of print Halo Actionclix Figures from Wizkids.  I looked at the UNSC Marines and ODST Troopers.  In contrast to the Mantic and Defiance figures, these ones are a little on the tall side and the soft plastic is a little on the soft side in details.  They come pre-painted and the ODST dark paint scheme would work, but the green marine would need to be re-painted.

Left to Right:  Halo ODST, Halo Marine, Corporation Marine


Looking farther to the back of my figure boxes are some troops from the now out of production AT-43 from the equally defunct Rackham.  I’ve got a UNA Star Trooper, a Red Blok Spetznatz Kommando and a Red Blok Dragonov Kommando.  All three have similar pros and cons.  They are all on par scale wise with most of my PA figures.  They all have armor and modern-ish weapons.   The Dragonov and the Star Trooper have enclosed helmets with night vision.  They came pre-painted to at least a passable table top standard, but I’d probably want to do a re-paint with a darker paint job.  I’m not really a fan of any of the lower bodies though.  Also, as with the Halo figures, the soft plastic makes the details, especially the weapons, soft and a little cartoony.  As with the others, they might work, but are still not exactly what I’m looking for.
 
Left to Right: Dragonov Kommando, Spetsnatz Kommando, Star Trooper
 

The last  out of the box figures are the Dream Forge Eisenkern troopers.  They’ve got armor, projectile weapons, a fully enclosed helmet and they scale up great with my PA figures.  They are also very well sculpted hard plastic figures.  On the downside though, the armor is a little too sci-fi for me.  Also, the upper torso has too much of a medieval feel with the big shoulder pads, gorget and pointed neck collar.

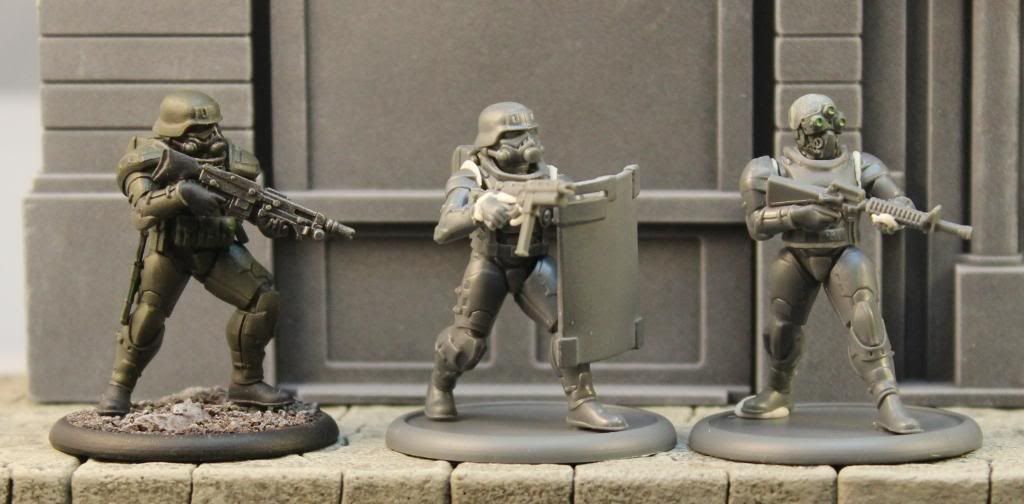
Last up I figured I’d give it a try to do some conversions from the Eisenkern troops.  Forgive the WIP look but the figures are just held together with blue-tac for now.  First I used a stock body and head and fitted the arm with a riot shield from an old Void 1.1 kit.  On the next figure I ditched the back pack, shaved off the faux gorget and trimmed down the collar.  The conversion is a little rough and will need to be cleaned up and the collar trimmed up with green stuff.  This doesn’t change the sci-fi feel, but it at least it makes the armor look more generalized.  The MG-43 look alike was a little to iconic as was the helmet, so I swapped out with an M-16 from the Wargames Factory survivor kit (men or woman) and a helmet from and AT-43 trooper.  I ditched the shoulder pads on both figures.  They might work too, but still not perfect.
 
Left to Right:  Stock Eisenkern, Eisenkern with shield, Eisenkern conversion
 

Well that’s all I could find in my collection.  Let me know what you think.  Will any of these work?  What do you think is best?  Are there any I missed?  Feedback is appreciated.

Sunday, October 6, 2013

Zombicide Season II Prison Outbreak Zombie Review


Today I’ve got my first post ready to join the “Zombtober” challenge posted by (ZOMTOBER Challenge!).  The rules are pretty simple in that you complete and display at least one zombie or apocalypse survivor every Sunday in October.  With thirty three bloggers participating the results should be interesting.  I don’t fly the flag of the ZBA (zombie bloggers association), but zombies are a big part of my building and painting these days so I thought I would give the challenge a shot.

This week, I’ve focused on the zombies from the second season of the Zombicide board game franchise.  The kickstarter delivery has been a bit fragmented and disorganized, so some backers received the entire first wave delivery a month ago, while others still haven’t received anything.  I’m somewhere in the middle.  Two weeks ago I received the two big ticket items with Zombicide: Toxic City Mall and Zombicide:  Prison Outbreak.  Hopefully the first wave of Kickstarter extras will ship in the next month or so.  In the meantime I’ve been having a great time rooting through the two boxes.

Prison Outbreak is a standalone game in its own right but it is backwards compatible with both the core Zombicide game and the Toxic City Mall supplement.  It has six new survivors and zombivors (zombie versions of the survivors), introduces “berserker” zombies and best of all, it includes almost 50 traditional zombies from the core game with all new sculpts.

 I’ve spent the week rebasing and painting up one of each of the unique sculpts for the traditional zombies in the Prison Outbreak box.   The original zombies from the first season of Zombicide were decent sculpts from the perspective of typical “board game” quality, but were a little short of traditional tabletop figures.  The arms were a bit thin and amorphous and the details (especially the male zombie faces) were quite soft and mushy.  From my perspective, the cost versus quality equation still came out as a good value, but they weren’t much to write home about.

Fast forward to this year and we get nine new sculpts that in most cases raise the bar on quality.


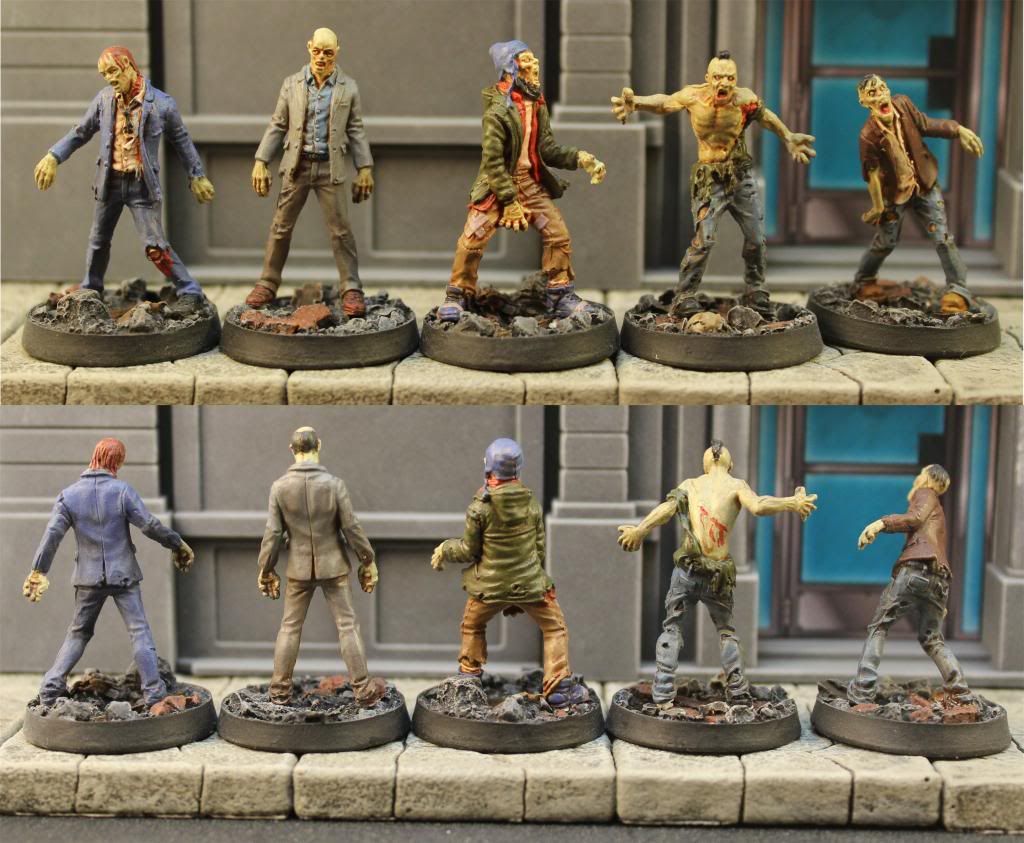
First up are the walkers.  In the Prison Outbreak box you get six copies of five unique sculpts of good old fashioned “shufflers”.   These models are much nicer than the first season.  The arms and legs have been sculpted thicker, which should help the large flex that the first season figures had.  Flex isn’t a problem if you are using the figures straight out of the box, but for painting, too much flex in the thin arms can lead to paint cracking and falling off.   Also, the new figures have much greater detail, especially in the faces.  For someone that paints in the style I do, using washes to gain definition, deeper cuts on the details is much appreciated.  Like the original figures, the hands may tend to look like webbed flippers, but I think that’s a function of the medium, which would not support well sculpted fingers. 


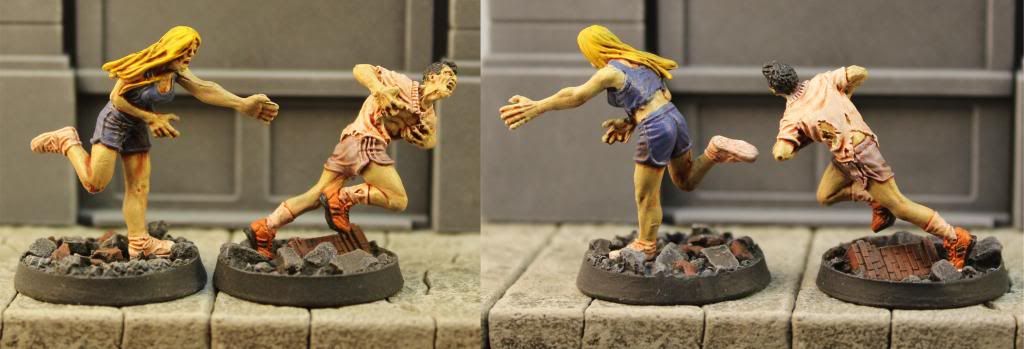
Next up are the two runner zombies and the only real stinker in the whole box.  The female runner on the left is in a very awkward pose and has the oddly oversized gorilla arms reaching out.  Worse, out of the box she comes with a large peg attaching her back leg to the base. 


Not a great figure in my opinion especially compared to her concept art (PO Runner Concept).  On the plus side at least we get a little diversity to the runner ranks now.  The male runner on the right looks nice, although why he’s pulling a superman and ripping off his shirt is a mystery to me.


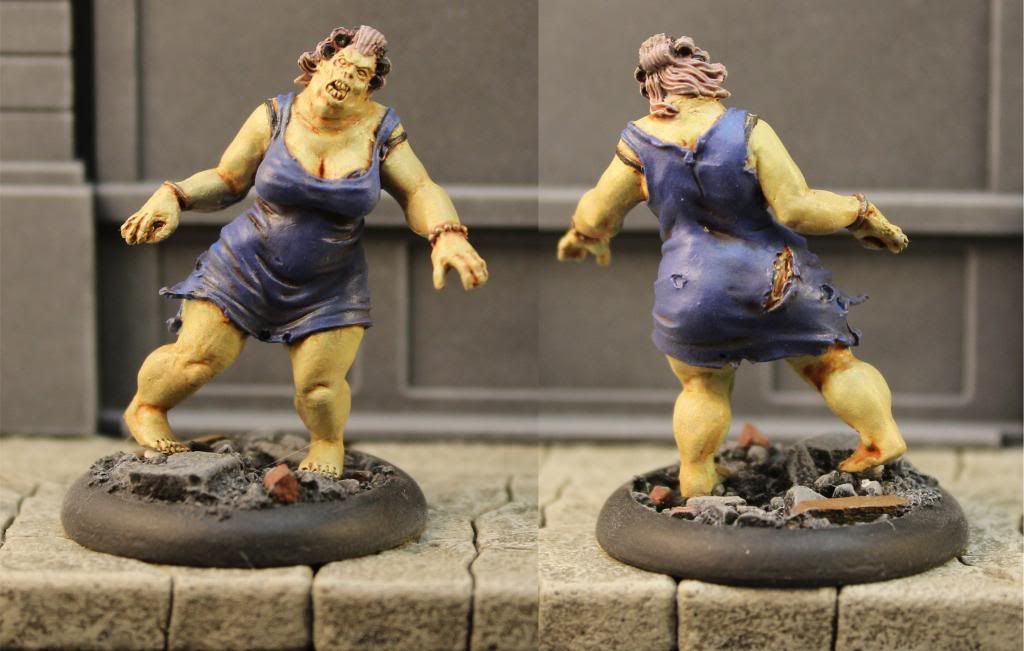
Now we come to the “fatty” zombie.  She’s a big lady in curlers and a too small dress.  I think the figure is a little over the top, but I think it matches up ok with the first season fatty pretty well.  Nice detailing compared to some of the softer features of the original fatty as well.  Unfortunately I messed up on the basing.   I thought she would look good shambling over some rubble on the base, but I don’t think it came out as well as it could have.  At some point I think I’ll pull her off and rebase her.

 
The last figure is the Abomination Zombie.  In game terms, he’s a walking tank that can only be killed by rare weapons, and if he appears early in a game you end up spending most of the game running away until you search through the deck to find something powerful enough to take him down.  While this guy’s the same height as the original abomination, his “hulking out” pose with arms raised makes him look that much more intimidating.  All in all another good figure.


CONCLUSION

For single part board gaming figures these are good sculpts that I think exceed the quality of the originals.  I plan on mixing them up with the original set to give games of original Zombicide a greater variety.  Now it’s on to the survivors.


Thursday, September 26, 2013

Plastic Figure Mash Ups


This post is for Colgar6.  Great minds must think alike I guess.  Like him I’ve also been working on some mash up figure conversions using various parts from my bits box covering a range of different kits and companies.  If you haven’t seen Colgar6's conversions, I recommend them as a good read and good inspiration.  (here and here)

 If you like plastic figures, it’s never been a better time to be in our hobby.  The number of companies producing kits and the continuing improvements in kit quality have never been better than they are today.  One of the few downsides of all of the new plastic kits is that to recoup the cost of cutting the molds, companies end up pushing a lot of sprues into a single box.  Studio miniatures packages their plastic zombies with 60 figures, the Wargames Factory zombie vixens come 30 to a box and so on.  The result, if you care about making as many unique figures as possible, is that you’re left with a bunch of figures you can’t use, at least not for their original purpose.  By now I have an entire office box stuffed with partially used plastic sprues. 
I need more projects like I need a hole in the head (I’ve got at least 50 figures still new in the box just waiting for their turn on the work bench), but this is one of those ideas that gets stuck in your head and just won’t go away until you give it a try.  So to use up some of those extra figures I've been trying out some parts swaps to create both survivors and zombies.
Get off my lawn!
Up first is a figure I actually have finished.  I put him together earlier this summer after the Wargames Factory male survivors came out.  The Studio Miniatures zombies only come with four unique bodies and I ran through most of the obvious combinations within the first twenty zeds.    With lots of sprues left over, using these bodies was my first priority.    Old Zeek has a body from Studio Miniatures zombies, arms and a scoped rifle from Wargames Factory Late WWII Americans, and a head from the Wargames Factory male survivors.   

Overall the figure turned out nicely, although the head is just a little too large for the body.  Thankfully the pose seems to hide this for the most part.  The arms fit so closely with the body that I did not even need  to fill the joints.
 
 
With the success of the first figure I moved on to another.  Here is another body from Studio Miniatures, this time with both the head and the arms from the WGF male survivor kit.  This one didn’t turn out quite so well.  This time, the oversized head is much more apparent and the arms are also a little oversized as well.  Overall the figure still works, but I figured I could do better.

 
Ned Rabinski was living in his remote
cabin writing anti-goverment tirades before
the apocalypse spoiled his seclusion.
 
For the next figure I used another SM zombie body this time I used a set of arms from the WGF female sprue, which are much better fitting.  In effort to solve the bobble head issue, I pulled out a head from an old kit.  To the best of my recollection this is a head from the WGF Celts sprue, but I can’t be sure.  The size of the head is a little closer, but I think I left the neck a little long.  Overall though, I still think the figure hangs together just fine.  With this figure I actually took the time to fill in the rips in the shirt.  Not a big deal but it helps differentiate him from the zeds with the same body.


Next up I wanted to raid the WGF Zombie Vixen sprues.  As with the SM figures, the bodies are fairly unique and I didn’t need three copies per box as zeds.  Here I’ve used a Vixen body and left arm with the brief case.  The head comes from the WGF female survivor kit.  For the right arm, I can’t remember if this was from the WGF male or female survivor kit.  Overall the figure works but the thickness of the survivor arm is substantially thicker than the zombie arm and the sleeve cuffs are different.  Hopefully the differences will fade somewhat with a coat of paint.


Last up for the survivors is another WFG vixen body, this time the one in the pant suit.  She has arms and an assault rifle from the WFG female survivors.  The head is also from the Vixen set and is just about the only head on the set without visible wounds.  She’s missing a high heel, so this will be a great instance to use one of the spare high heels from the WGF female survivor set.  Again, I think the figure came out well and should be even better painted.


I also wanted to reverse the process as well.  I have three copies of each survivor body from the WGF kits.  For most I probably won’t be building all three into live survivors.  I used some of the extra arms and a head from a Studio Miniatures zombie to come up with my first mash up zed.  I think the arms worked out well (with a copious amount of green stuff) but I thought the head wasn’t quite large enough.  On the whole though I think he came out ok.


For the next zed, I again used a WGF male survivor and SM zed arms.  But this time I went for a head from the Mantic zombie kit.  This head is just a little too large, but I think the more expressive sculpting more than make up for it.  The only downside of the mantic heads is that they come with no neck (it’s sculpted to the body) so I had to initially pin the head on a brass rod and then build up the neck with green stuff.  I really like the end of the result on this one, he's certainly no shuffler.

 
'Cause this is thriller, thriller night!


Next up I used parts from the same kit breakdown (WFG body, SM arms and Mantic head).  Although I think this head may have been from the ghoul set, not the zombies (it was a loose part in my bits box).   With the choice of body and the set of the shoulders, this zed didn’t turn out quite so well.  He looks more like an extra from Michael Jackson's Thriller rather than an actual threat.


I continued with the same breakdown for the last figure (body, SM arms and Mantic head) as well.  On this one I think the oversized head really stands out, but again I think the expressive sculpting make it work better than the smaller, but more boring SM heads.


Overall I ended up with a couple of duds but a few really good figures as well and they are certainly more unique than what I could make out of the box.  I haven’t even come close to mining all the possibilities by mixing and matching parts.  I still have plenty of zombies I should be able to put together from the WFG female survivors as well.  Hopefully they match up with the Vixen parts as well as the survivor figures I made.