The model is inspired by the "Big Dog" robot created by Boston Dynamic. More on the real thing can be found here.
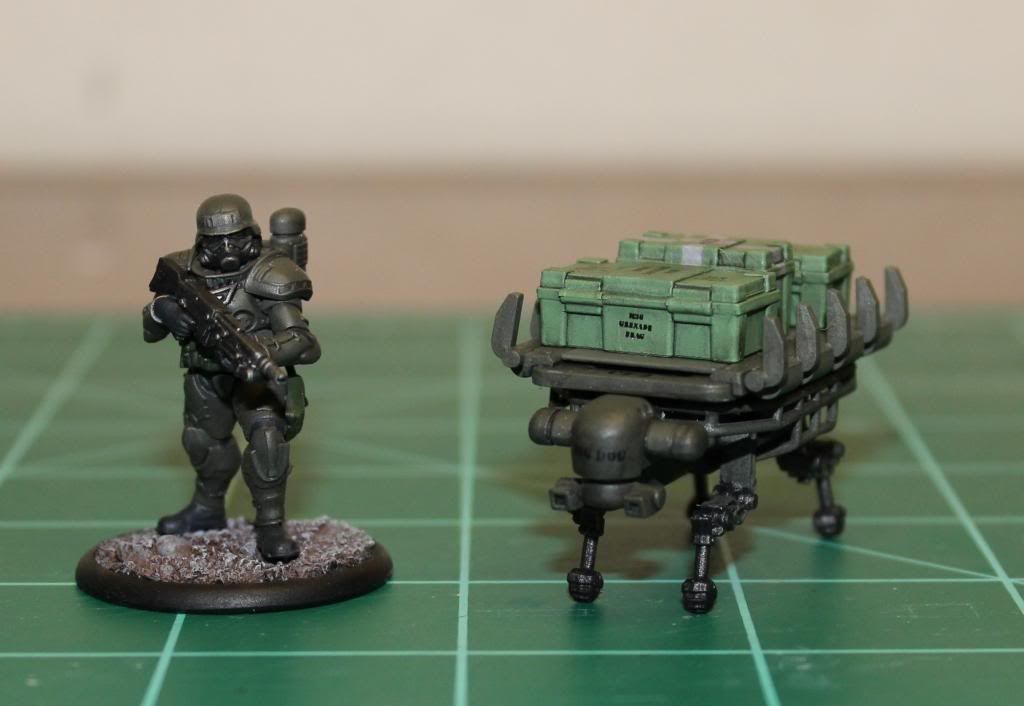
The DreamForge accessory set comes with three mule kits in the box to accompany your stormtroopers. The mule is well designed and goes together easily until you get to the legs. Each leg comes in three pieces. Let me rephrase that, three tiny pieces. Mark from DreamForge gave some good advice on his blog to assemble the legs and let them dry before attempting to attach them to the body. It's good advice and it helped me get the kit together without much trouble. The kit comes with two heads. One is a more artificial looking head with a sensor mast called the "command and control head". The other, which I chose for this model is the more anthropomorphic "smart mule head". I don't know if the different heads will have any effect on game play, so I'll probably magnetize the heads on any future kits.
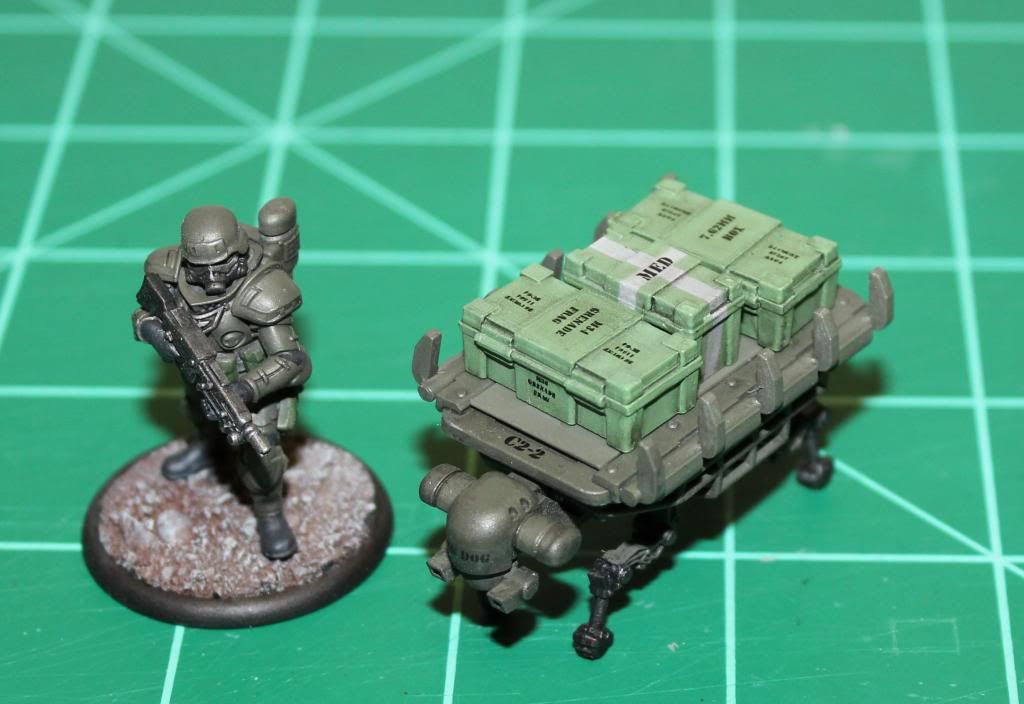
For ease of painting, I assembled the body, head and legs, but left the top platform and side cages separate until the end. I painted the body in gunmetal and the rest in the same German Fieldgrey as my trooper's armor. Just to add a little personalized touch I printed up some decals for ID markings. This mule is C2-2 "Big Dog" (Charlie company, 2nd Platoon, 2nd Squad). They turned out ok, but the decal on the head silvered a little.
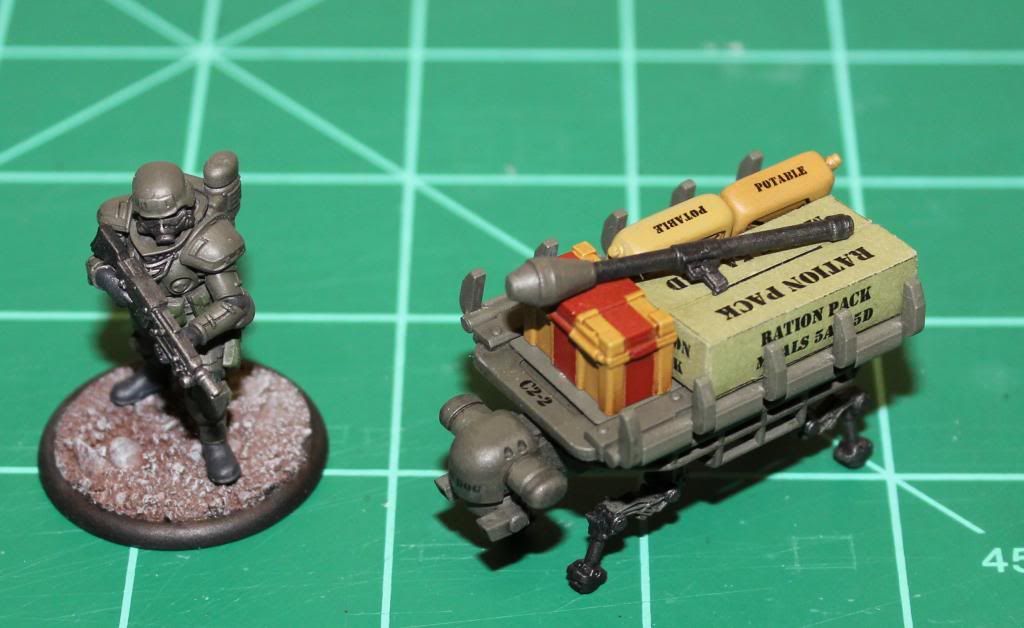
A mule won't do the squad much good without cargo. The accessory set also comes with storage crates (three small and six large). I painted these up in a lighter green and gave them decals as well. The smaller crate is medical supplies and the larger crates have ammunition. I also wanted to add some Class I supplies (food and water). I scrounged through my bits box and dug up some 1/35 scale water cans and added a ration box that I printed on card stock.
Without knowing how the mule should be loaded up for game play, I decided to make the cargo loads interchangeable I cut two small pieces of 0.04" sheet styrene to fit between the side rails of the cargo platform and then glued the cargo to the styrene to create cargo pallets. I painted up a spare panzerfaust (also from the accessory set) but haven't glued it down.
Here is the completed mule with a Class V loadout (ammunition):
Here's one with a Class I loadout:

All in all, a nice little mini kit, although the engineer in me thinks the large platform so high up would make the thing very top heavy and prone to toppling in rough terrain. I think the real life version with the saddlebag type arrangement would work better. I have to say that this should be for experienced modelers or novices with an abundance of patience.
hi ive just been working on mine, great painting and idea for the cargo, where are the decals from, ive been struggling to find small letters and numbers
ReplyDeleteThanks for the compliment. The decals and the ration boxes are home made. For the decals, I used blank decal paper and printed them with a laser printer. I used the "stencil" font, which I believe is a standard windows font. The smaller decals are printed at 3.5 while the bigger ones are 6.
DeleteThe ration boxes are printed on colored card stock and folded like a real cardboard box.