I came away with a couple of firm opinions. First, I won't be using camouflage or over the top Gothic style heraldry. On the camouflage, it seems like a waste of time to camouflage a fifty foot tall robot. On the heraldry, I found some very lovely painted examples, but they strayed too close to the Warhammer 40K aesthetic for me. I'm not looking for a titan proxy. I want the Crusader to stand on it's own merits.
In the end I opted for a dirty green color for the armor plates and I'll let the exposed mechanical bits remain dry-brushed metal. I'm using a black primer, with a base coat of Army Painter "Army Green" spray. To that I apply a couple of black washes and then I weather with some dark grey, metalics and some rust effects.
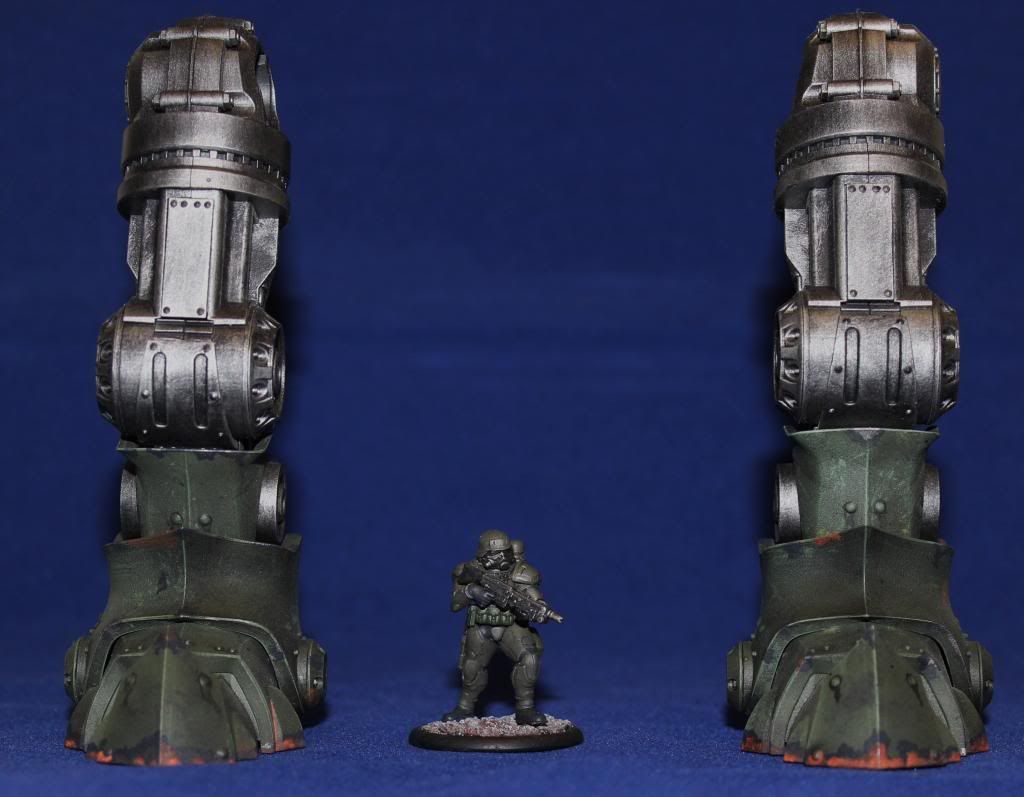
The weathering was a little ham-handed, as I haven't weathered anything this big in a while, but at tabletop distance, it holds together. My plan is to have the most wear on the feet and then get cleaner as I work farther up the model.
I'm not really in love with the design style of the feet. They are a little more pointy and Gothic than I'd like to see, but I'll get over it. Any fear I had that the joints were too loose disappeared when I got the armor on. With all of the fully painted parts put together, the feet and ankle joints are quite stiff. I can still move them, but it is significantly harder now. When complete this certainly won't be an action figure.

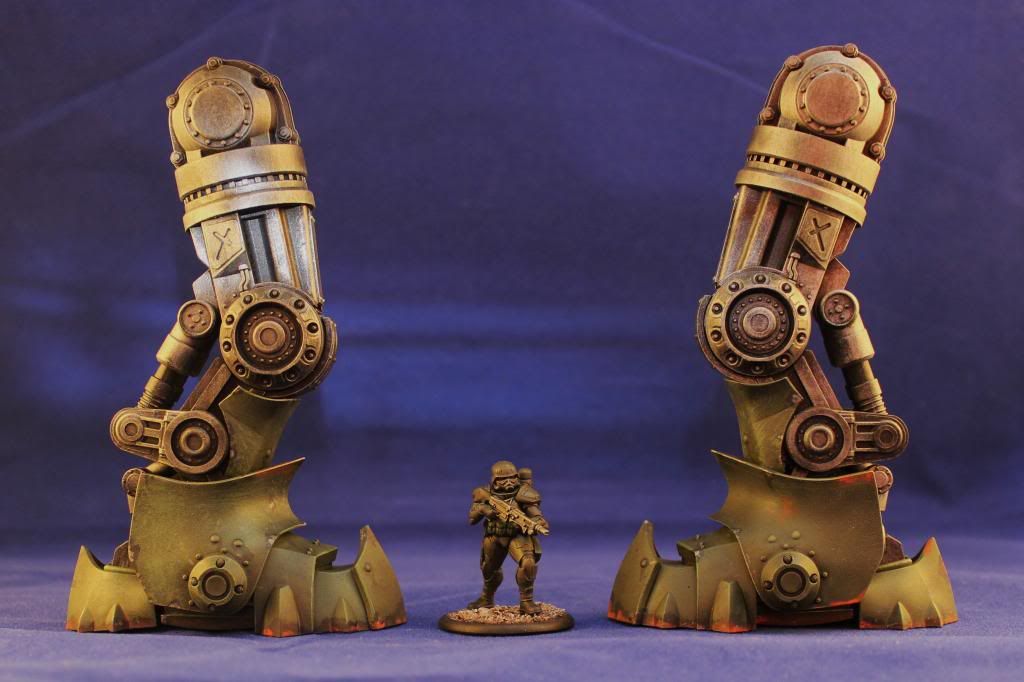
Here's a shot of the bottom of the foot and the first deviation to the instructions I've made. The kit comes with a plastic base, but assuming that I ever use this guy on the tabletop, I'll want to make it removable. The solution to that, as always is magnets. The central foot pad had a circle at the center of the "x" just about 1/4" across. It was easy to drill out this area and insert a 14" diameter, 1/8" tall rare earth magnet in each foot pad. I plan to place an opposite pair into the model's base. It will not be a terribly strong joint, but it should suffice for a static display model. I've found in the past that when using magnets, the paint tends to chip out rather easily. To prevent that, I used a triangular hole punch to create a thin spacer from .01" sheet styrene.
Things are actually progressing a little faster than I had imagined and I should have the leg and knee armor done this week. Famous last words I know, but this project might finish up faster than I planned.
No comments:
Post a Comment