I have finally cleaned off my workbench (at least of recent
projects) and have gotten enough space cleared off that I can start on my
Leviathan kit! This plastic kit was the
main showcase for the 2012 Kickstarter Campaign by DreamForge Games. They added many other kits along the way, but
this was always the centerpiece. Leviathan’s
are a bipedal, manned, fighting robot that constitute the elite weapons of the
Iron Core Universe. The written
descriptions to date sort of reflect the Mechwarrior Dark Ages where these
large machines are rare and greatly treasured.
DreamForge has stated that the Iron Core game (if and when it is
released) will be built around using these models (and other leviathan kits) on
the tabletop. I’m a little dubious that
DreamForge can pull that off, but even if it never comes to be, this will still
be a pretty cool model.
I received my kit this March and while I have been marveling
at it, I waited until now so I could really devote the time and attention it
deserves. There have been other very
nice un-boxing reviews and video build-ups of the leviathan posted around the
net. I can’t add a whole lot to those so
I’ll go down a different road and just walk through my progress as it happens.
One important note is that the printed instructions provided
in the box are incorrect in a number of places and DreamForge have released an
electronic version with the correction for wrong part numbers. This is very important as you’ll end up
scratching your head when parts don’t fit if you are using the old instructions.
Here's a link to the updated instructions:
Another important note is on the screwdriver. Parts of this model are held together with
small Philips head screws. The kit provides
a small screwdriver, but I found it to be severely inadequate. First, the provided screwdriver is too small
for the screws. If you use it, you will
start to strip out the inside of the screw head as it slips around. Secondly, you need to apply a fair amount of
torque to the screws to get them to tighten up.
The screwdriver provided is so small that it’s hard to get a good
grip. I just ditched it and used a
larger screwdriver from my tool box. It
is also a little hard to find the point where the screws are tight enough to
hold the joint stiff, but not so much that you strip out the plastic. It takes quite a bit more force than you
might think. Luckily I managed to get
all of the screws in the leg joints without problem.
CONSTRUCTION PLAN
The kit is designed in a very similar way to some of the
fancier Gundam “Perfect Grade” kits that Bandai produces, in which there is an
internal frame that articulates and an outer shell of armor parts. I built one of those kits years back and I
figure that assembling the leviathan the same way will work best. To that end I have started with just the internal
leg pieces. From there I’ll work on the
armor plates from the bottom up. After I
get the legs in good shape I’ll re-evaluate and see where to go next.
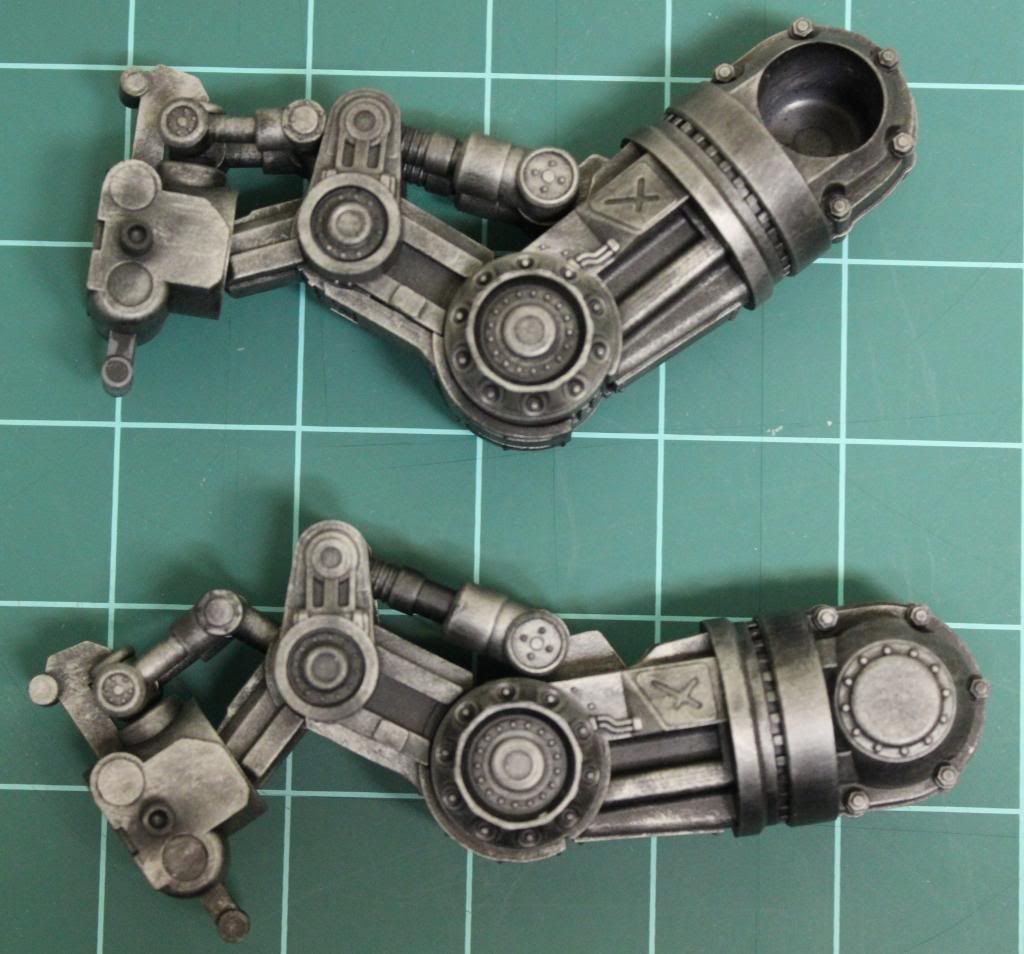
When I put together the legs, I assembled them without the hydraulic
pistons on the back. At first I was
worried as the joints of the unpainted parts were not very stiff. I was not sure that they would be able to hold
up the rest of the model without sagging.
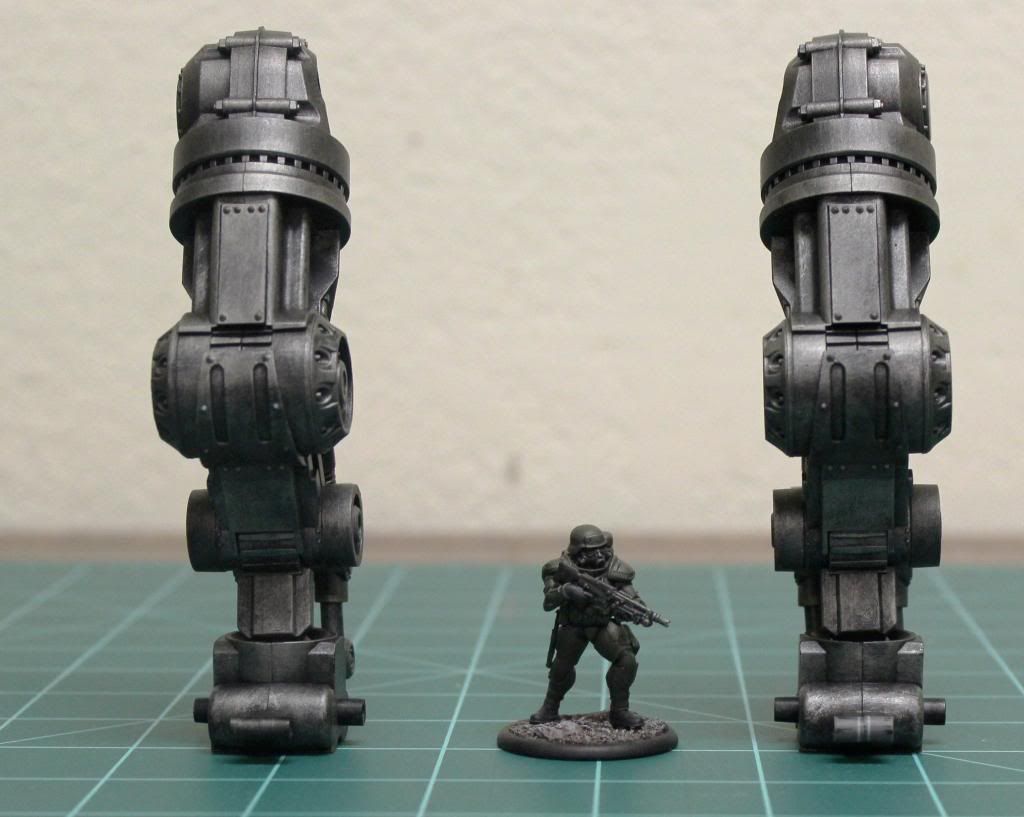
But Once I got the paint on, it stiffened up the joints
considerably. Next I added the pistons on
the back, which stiffened up the joints even more. I am now quite confident the joints will be
able to take the load just fine.
PAINTING
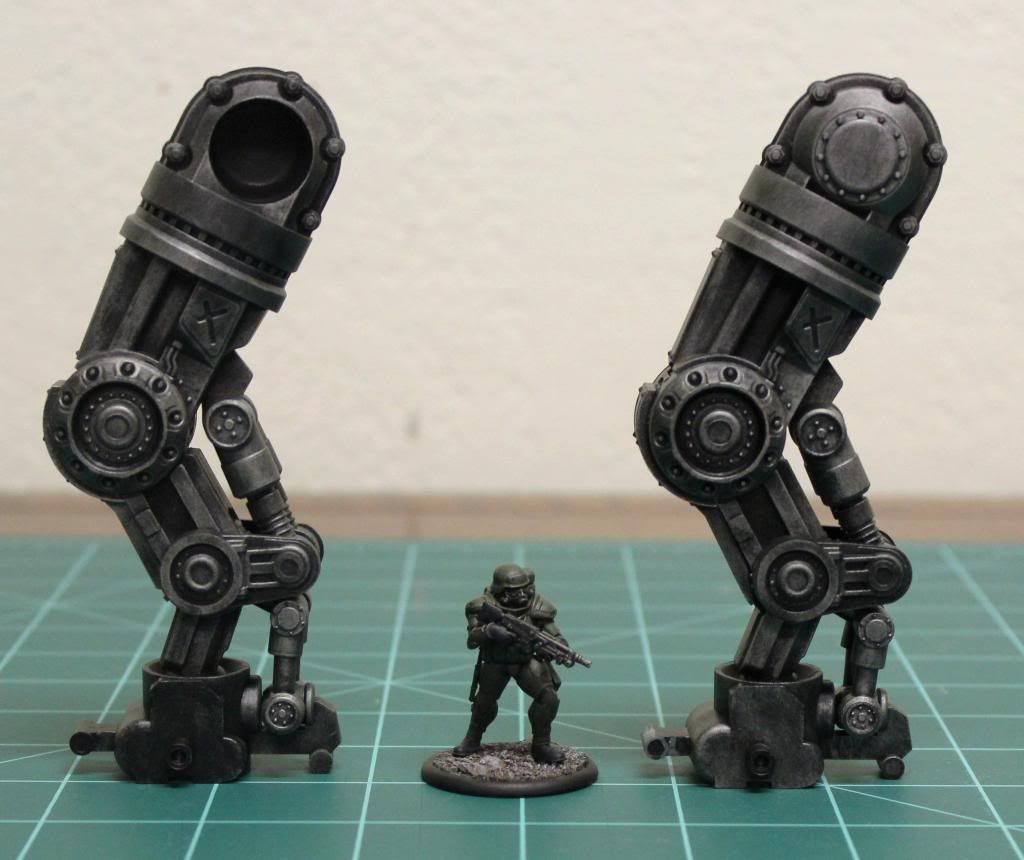
I kept the paint basic and went for a matte black primer
coat and added a generous dry-brushing of boltgun metal. My next plan is to give the legs a few light
washes of black to grunge them up and then I’ll seal them before moving on the
feet and leg armor. It’s a shame, but
most of these legs will be covered in armor plate and you won’t get to see
much.
So far I am very pleased with the kit. It is very well designed and cast. It is a true joy to work with. All of the joints move down to the pistons moving in and out. The end result should be quite
impressive. Unfortunately, at the pace I’m
working, this could be a three or four month project.

This thing will be a monster when complete as you can see by the scale of just the legs so far. At over 10" when complete it should be a site to behold.
Wonderful project! I think it is very well designed and seems to have good work because all of the joints move down to the pistons moving in and out.
ReplyDeleteRegards,
Barker Marine
Hydraulic Cylinder Seal kit