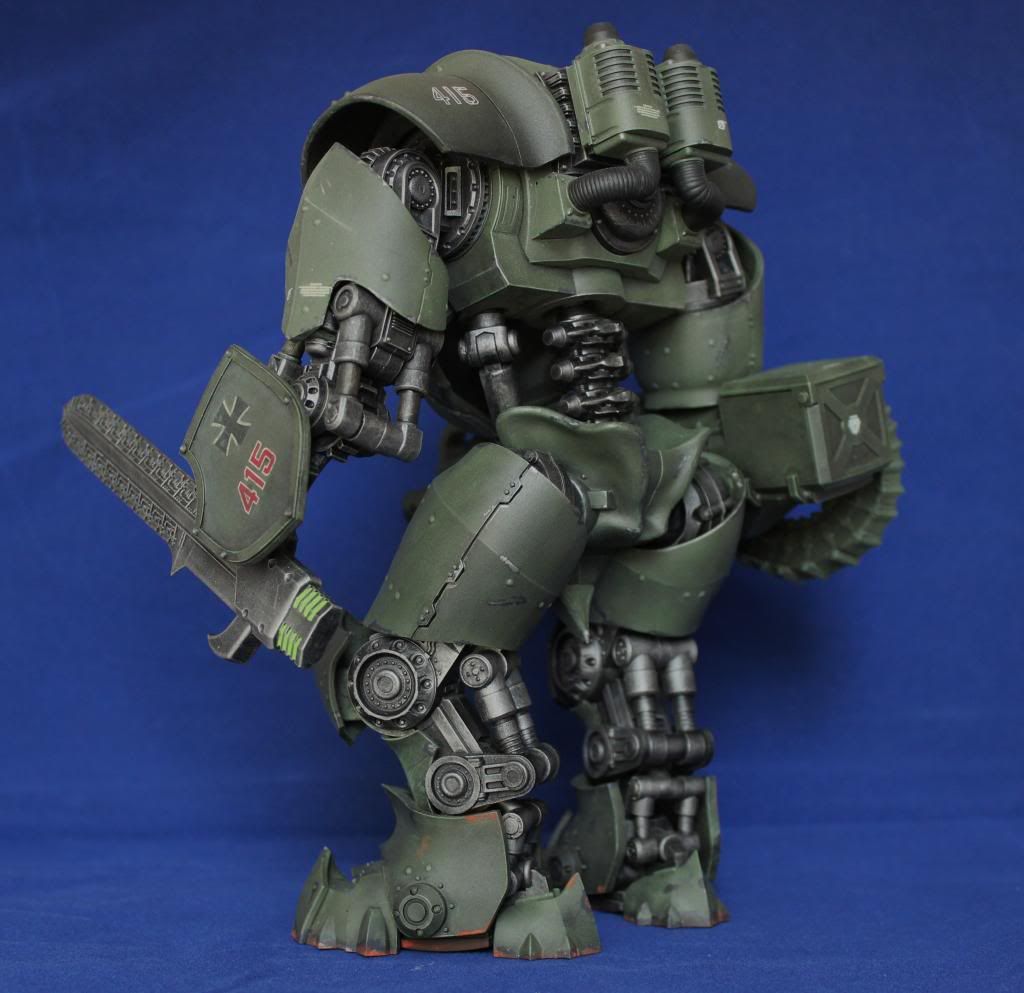
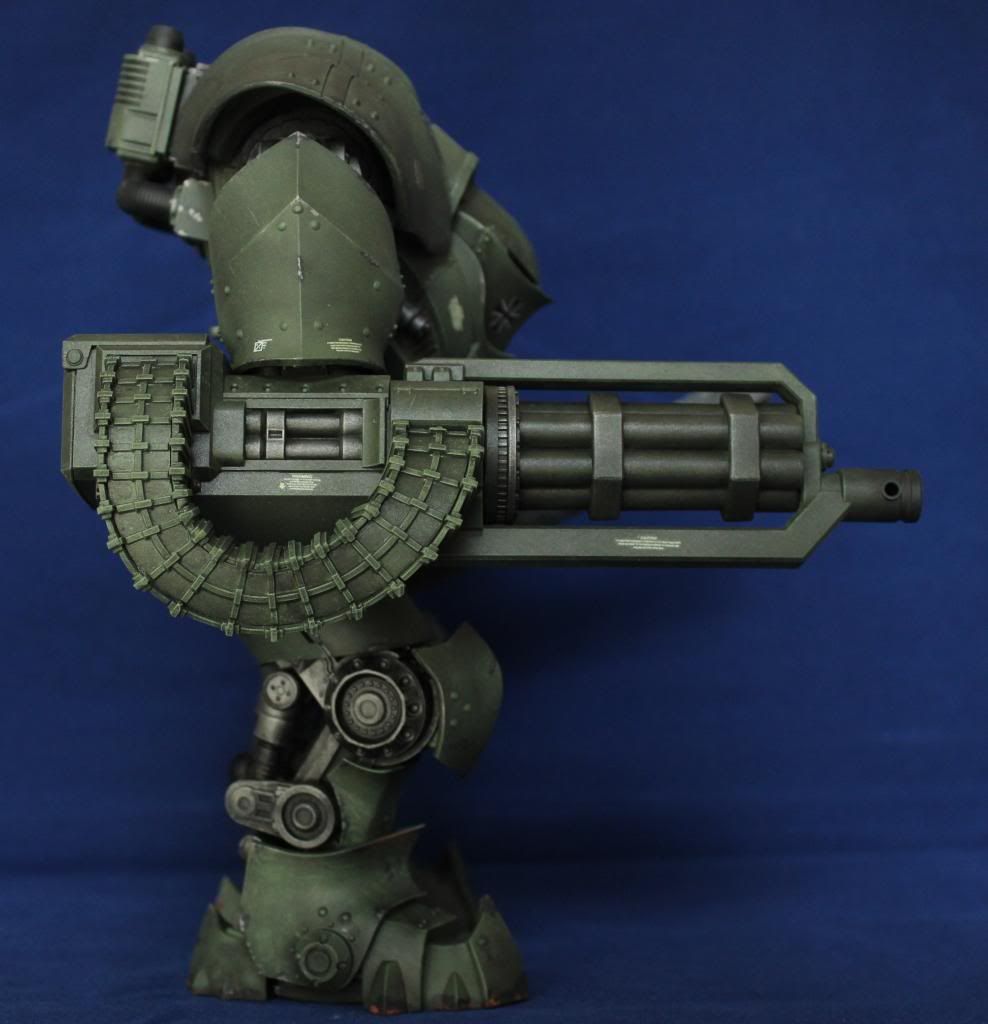
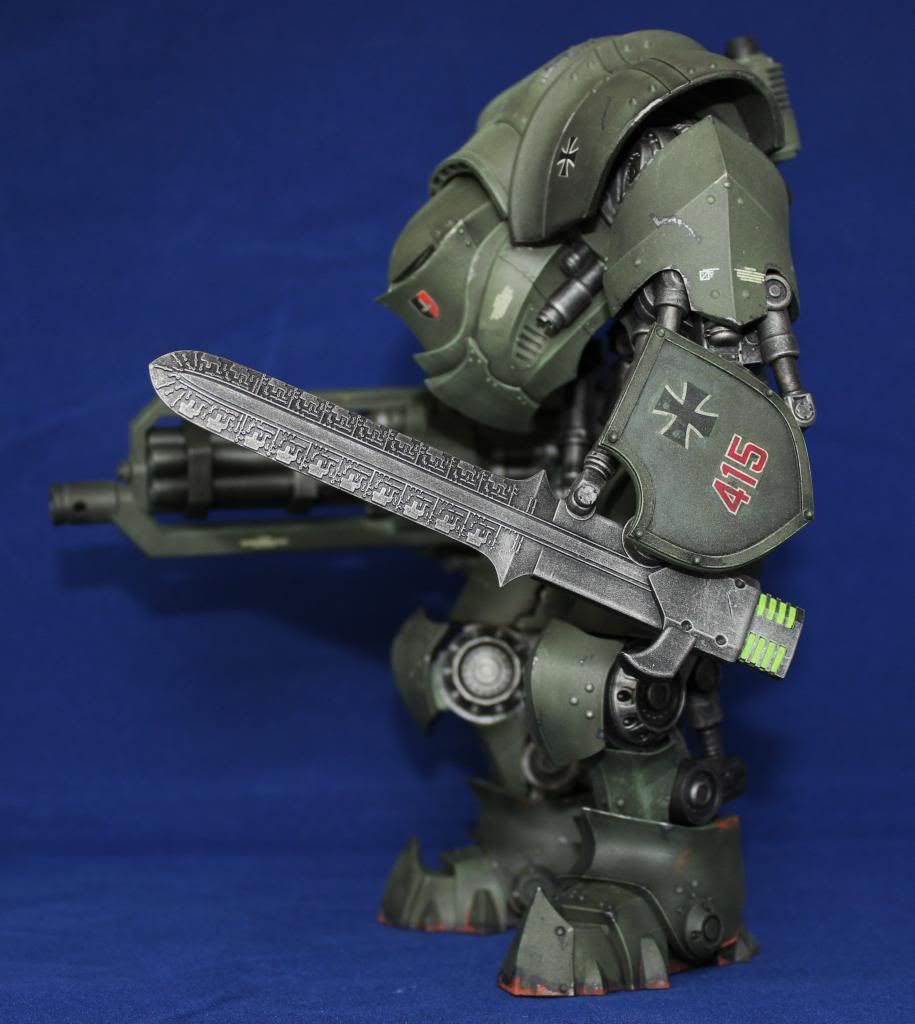
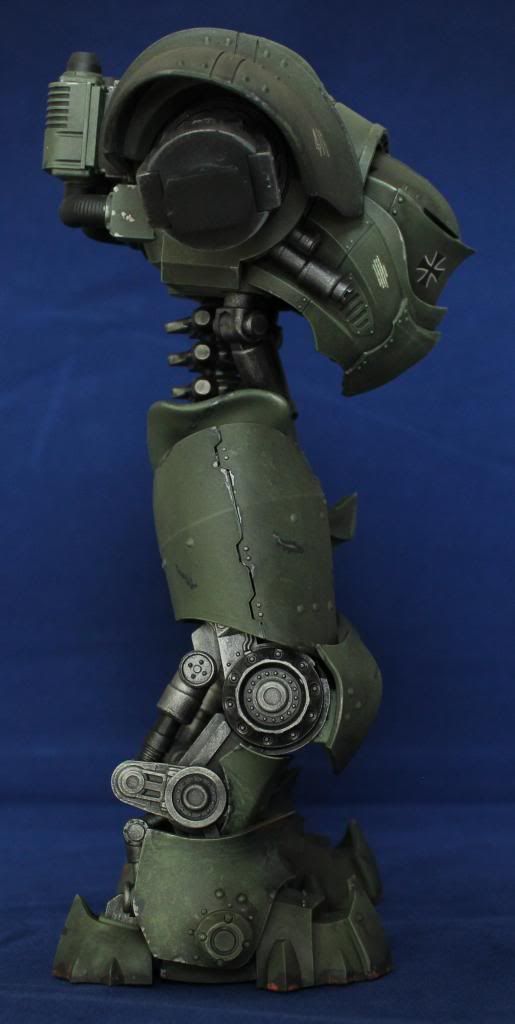
Whoo, Hoo!
The Leviathan Crusader is done! Well almost done. I still
need to complete the base and the gothic style exhaust stacks. But those
are minor details and I have the major components together, painted and
weathered. Here are some shots in all its glory.


Now that
I've got the project to this stage, I would like to share some of my thoughts
on how the Leviathan shaped up, the completed result and tips on things I would
do differently if I built another one.
SMALL ISSUES
The first issue is the leg joints. As you can see, my model squats down a little further than the shots of the factory plastic kit from DreamForge. This is because, despite my earlier assessment, the knee and ankle joints weren't as tight as they should have been. I thought I had them tight before painting, but they must have loosened up a bit somewhere during construction. I do not know if I could have tightened the screws any further without stripping them out, so it was just guesswork. I could try to use a little super glue to stiffen the joints (without completely locking them in place) with capillary action, but with the armor and pistons in place there really isn't a good spot to apply the glue. It's not a huge deal as there is some realism to the lower stance, but I have to worry a little bit about keeping the torso and arms in the right place to keep the center of gravity firmly over the feet. I have a comparison between the legs in my desired upright position and the spot they eventually sag to with the weight of the body and arms on them.


I also
had an issue with the joint where the torso meets the spine. Again before painting this joint seemed
sturdy enough, but now that I have the cannon arm in place the torso tends to
sag a little to the right (as the cannon is significantly heavier than the
sword arm. I don’t think this is so much
of an issue as the joints because I have more room to get in and tighten up the
ball joint.
My last
issue is the range of motion for the sword arm. It seems a little silly
to be contemplating the relative merits of a totally impractical weapon, but
the fact is that the sword arm is very restricted in its movements. The
shoulder guard up tops keeps it from being able to raise it any more than waist
height, so it would never be able to lift it for a power blow. Second,
there is no rotation at the wrist to use it to parry other swords. The
best the leviathan would be able to do with the weapon as designed would be to
flap its arm like a chicken.
OVERALL THOUGHTS
The joint
and sword arm issues aside, the final result of the build is still magnificent.
The kit was a true joy to build. While there were a few rough
patches here and there, most of the kit went together without issue. I would like to reiterate that only modelers with some experience should attempt this kit. If you are an inexperienced modeler, or
someone only familiar with smaller war gaming kits, I believe this kit could
cause you no end of cursing and frustration.
From an
aesthetic point of view, I’m still not a huge fan of the gothic, faux-40K look
that the kit sports. It certainly makes
sense from a certain point of view. DreamForge is a smaller company and
having cross-over appeal with Warhammer fans almost certainly boosted the Kickstarter
pledges and post Kickstarter sales. I
prefer a more traditional “blocky” style similar to the Battletech universe,
but I don’t see the Leviathan design as obnoxiously pointy and fortunately there are no skulls to be seen anywhere, so it will do.
THE FUTURE
So where
does the project go from here? Well, I
need to take a little brake from the Leviathan for a while and I will be out of
the hobby for most of July, so the short answer is that not much will happen
before August. When I do come back to
the kit I will have a couple of priorities. First, I need to take a few tweaks here and
there, like stiffening up the joints and cleaning up some of the flubs on my
weathering. I also need to paint the
original exhaust stacks as well. Then
I’ll tackle the base. I have plans to go
with a rubble strewn battlefield theme, so it will require quite a bit of Epoxy-Sculpt
and parts from the bits box to trick it out.
In the
longer term, I need to find a storage solution.
Hopefully, the next Kickstarter wave (with alternate arms and weapons)
will come to retail this fall. I will
probably wait until then to build the left cannon arm.
All in
all this has been quite a rewarding project and I can’t wait to see where
DreamForge goes from here.
Fantastic work on an amazing kit. Enjoy your break, hope it's invigorating ; )
ReplyDelete